


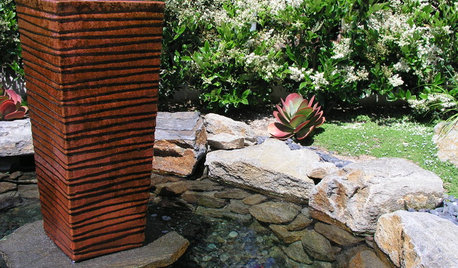
My mosaic fountain
loveapplefarm
19 years ago
Related Stories
GARDENING AND LANDSCAPING35 Fabulous Fountains
Cool Off and Be Soothed With a Little Water Music In Your Garden
Full Story
GARDENING AND LANDSCAPING10 Gorgeous Courtyards From Mod to Moroccan
Some have pools or fountains; some are awash only with greenery. These courtyards run the gamut of styles but have alluring looks in common
Full Story
LANDSCAPE DESIGN13 Extra-Cool Things to Do With a Backyard
Sure, you could just plop down on a blanket. Or you could create a dragon’s lair, a mosaic gallery, a party in a jungle ...
Full Story
COLOR8 Ways to Rev Up Your Garden Color With More Than Just Plants
Bring energy and excitement to your outdoor space by going bold with color, from small touches to big changes
Full Story
LANDSCAPE DESIGNUnwind in Your Own Private Garden Escape
When the world is getting on your last nerve, an outdoor refuge can soothe and nurture. Here's how to design a garden with relaxing in mind
Full Story
HOUZZ TOURSMy Houzz: Turning a Netherlands Barn Into a Country Home
Once a place for chilling milk, this Dutch home now lets the owners chill out in easygoing comfort
Full Story
LANDSCAPE DESIGNMake Your Garden Come Alive With a Sense of Movement
Master the illusion of motion for an exceptional garden that stirs emotions and the imagination
Full Story
GARDENING AND LANDSCAPINGPlan Your Patio at Summer's End? Yes!
Score fabulous deals for your deck, garden or patio and put your summer experience to good use in upgrading for the future
Full Story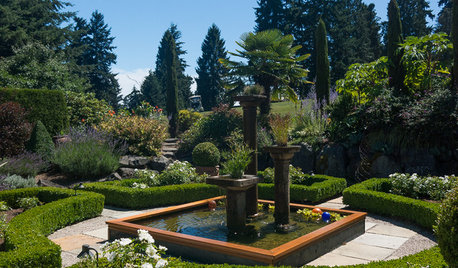
LANDSCAPE DESIGNGet a Mediterranean-Style Garden Even Far From the Sea
Some lavender here, a water feature there, and your garden just might feel transported to a balmy seaside locale
Full Story
REMODELING GUIDESTile Floors Help a Hot Home Chill Out
Replace your hot-weather woes with a cool feel for toes when you treat your floors to deliciously refreshing tile
Full Story
eva1429
faltered
Related Professionals
Derry Landscape Architects & Landscape Designers · New Bedford Landscape Architects & Landscape Designers · Elwood Landscape Architects & Landscape Designers · Prairie Ridge Landscape Architects & Landscape Designers · West Chester Landscape Architects & Landscape Designers · Billerica Landscape Contractors · Wake Forest Landscape Contractors · Fort Mill Landscape Contractors · Metairie Landscape Contractors · Pahrump Landscape Contractors · Pine Hills Landscape Contractors · Weymouth Landscape Contractors · Whittier Landscape Contractors · Orange County Siding & Exteriors · South Windsor Siding & Exteriorseva1429
gardenrose
tomtuxman
Dena6355
Dena6355
iowajewel
butterbeanbaby
zooter
loveapplefarmOriginal Author
eva1429
suezn5
techsupport8
little_dani
loveapplefarmOriginal Author
klinger
Yasmine
Tnflower_lover
Janis_G