


Miniature Brush Cherry Back Budding Question
thams
11 years ago

Sort by:Oldest
Comments (8)
Related Stories
TRADITIONAL HOMESHouzz Tour: A Masterly Miniature on Boston’s Beacon Hill
A painting spurs the palette for a period-faithful renovation of a studio in a converted 1850 governor’s house
Full Story
TROPICAL STYLEMy Houzz: New York Chic and Laid-Back Hawaiian Style on Maui
A relocating New Yorker designs an island home influenced by her former city life
Full Story
HOUZZ TOURSHouzz Tour: A Minnesota Home Is Loved Back to Life
An industrious family serves unwanted critters an eviction notice, turning their house from run-down to lived in and cherished
Full Story
DECLUTTERINGDecluttering — Don't Let Fear Hold You Back
Sure, you might make a mistake when tackling a decluttering project, but that's OK. Here's why
Full Story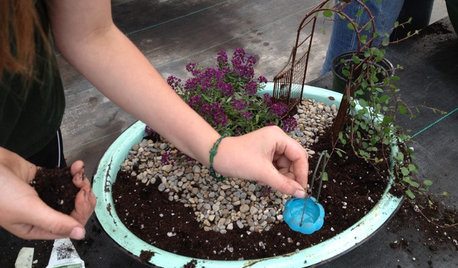
GARDENING GUIDESGardening Fun: Plant a Fairy Garden
It’s hard not to be captivated by the charm of a miniature garden in a pot. Here’s how to make one of your own
Full Story
REMODELING GUIDESYour Floors: Zebra, Tiger, and Teak Wood, Oh, My!
Get the Pros and Cons of Exotic Woods: Hickory, Cherry, Rosewood and More
Full Story
DECORATING GUIDESThe Hottest Houzz Discussion Topics of 2012
Discussions rocked and rolled this year with advice, support, budding friendships — and oh, yes, a political opinion or two
Full Story
GARDENING GUIDESBromeliads: The Ultimate Collector’s Plants
Once you discover bromeliads’ exotic beauty, wide-ranging colors and intriguing patterns, you’ll never go back
Full Story
KITCHEN DESIGNA Cook’s 6 Tips for Buying Kitchen Appliances
An avid home chef answers tricky questions about choosing the right oven, stovetop, vent hood and more
Full Story
ARTThe Beauty of Bonsai — Living Art, Rooted in Harmony
Create your own emblem of nature's balance with an art form dating back 1,000 years
Full Story

tapla (mid-Michigan, USDA z5b-6a)
thamsOriginal Author
Related Professionals
Arlington Landscape Architects & Landscape Designers · Arlington Landscape Contractors · Columbine Landscape Contractors · Dallas Landscape Contractors · Natick Landscape Contractors · Raleigh Landscape Contractors · Baltimore Decks, Patios & Outdoor Enclosures · Cedar Falls Decks, Patios & Outdoor Enclosures · Champaign Decks, Patios & Outdoor Enclosures · Gaithersburg Decks, Patios & Outdoor Enclosures · Hayward Decks, Patios & Outdoor Enclosures · Hershey Decks, Patios & Outdoor Enclosures · Lauderdale Lakes Decks, Patios & Outdoor Enclosures · Lenexa Decks, Patios & Outdoor Enclosures · Rocklin Decks, Patios & Outdoor Enclosurestapla (mid-Michigan, USDA z5b-6a)
thamsOriginal Author
thamsOriginal Author
tapla (mid-Michigan, USDA z5b-6a)
thamsOriginal Author
thamsOriginal Author