


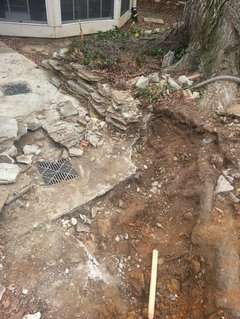
Retaining Wall and Drainage advice
bigbigblake
11 years ago

Featured Answer
Comments (16)

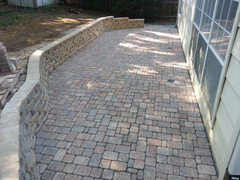
bigbigblake
11 years ago PRO
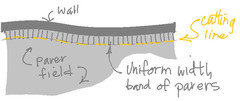
PROYardvaark
11 years agoRelated Professionals
Clark Landscape Architects & Landscape Designers · La Marque Landscape Architects & Landscape Designers · Lowell Landscape Architects & Landscape Designers · Louisville Landscape Contractors · Rochester Landscape Contractors · Tewksbury Landscape Contractors · West Orange Landscape Contractors · East Norriton Landscape Contractors · North Aurora Landscape Contractors · Commerce City Decks, Patios & Outdoor Enclosures · Grandview Decks, Patios & Outdoor Enclosures · Hialeah Decks, Patios & Outdoor Enclosures · Towson Decks, Patios & Outdoor Enclosures · Cypress Swimming Pool Builders · Golden Glades Swimming Pool Buildersbigbigblake
11 years agobigbigblake
11 years ago- PRO
Yardvaark
11 years ago bigbigblake
11 years agocatkim
11 years ago- PRO
Yardvaark
11 years ago marcinde
11 years agobigbigblake
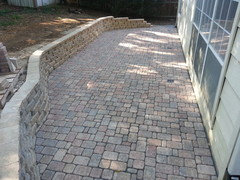
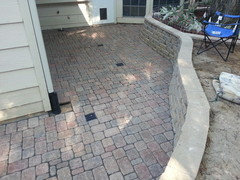
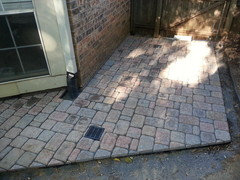
10 years agobigbigblake
10 years agobigbigblake
10 years ago- PRO
Yardvaark
10 years ago bigbigblake
10 years ago- PRO
Yardvaark
10 years ago


Related Stories

FARM YOUR YARDAdvice on Canyon Farming From L.A.'s Vegetable Whisperer
See how a screened garden house and raised beds help an edible garden in a Los Angeles canyon thrive
Full Story
DECORATING GUIDESDecorating Advice to Steal From Your Suit
Create a look of confidence that’s tailor made to fit your style by following these 7 key tips
Full Story
BATHROOM DESIGNConvert Your Tub Space Into a Shower — Waterproofing and Drainage
Step 4 in swapping your tub for a sleek new shower: Pick your waterproofing materials and drain, and don't forget to test
Full Story
LANDSCAPE DESIGNPile On Style With a Dry-Laid Stone Retaining Wall
Durable, natural and practical, this landscape feature is an art form unto itself
Full Story
LANDSCAPE DESIGNGarden Walls: Dry-Stacked Stone Walls Keep Their Place in the Garden
See an ancient building technique that’s held stone walls together without mortar for centuries
Full Story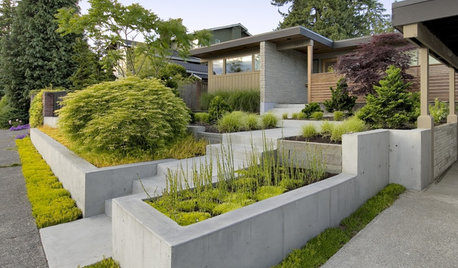
LANDSCAPE DESIGNGarden Walls: Pour On the Style With Concrete
There's no end to what you — make that your contractor — can create using this strong and low-maintenance material
Full Story
GARDENING GUIDESGardening Solutions for Heavy Clay Soils
What’s a gardener to do with soil that’s easily compacted and has poor drainage? Find out here
Full Story
GARDENING AND LANDSCAPINGHow to Pick a Nice Wall for Your Garden Room
Made by hand, prefab or growing from the ground, garden walls are key landscaping elements. Here's what to think about for your yard
Full Story
REMODELING GUIDES9 Expert Tips for Creating a Basement Bedroom
Put overnight guests up in comfort or enjoy the bonus bedroom yourself with this professional advice for converting your basement
Full Story
HOUZZ TOURSHouzz Tour: Butterfly Roofs Top a Sydney Terrace House
Modern remodel retains 19th century facade while pouring natural light into new and old spaces
Full Story


bigbigblakeOriginal Author