


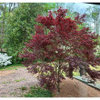
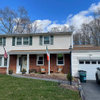
pavers, floating deck, or something else (PICS)
DIY_GUY_419
11 years ago
Featured Answer
Comments (117)

DIY_GUY_419
11 years agolast modified: 9 years agoinkognito
11 years agolast modified: 9 years agoRelated Professionals
Ballenger Creek Landscape Architects & Landscape Designers · Finneytown Landscape Architects & Landscape Designers · Biloxi Landscape Contractors · Cicero Landscape Contractors · Coeur d'Alene Landscape Contractors · Dallas Landscape Contractors · La Mirada Landscape Contractors · Louisville Landscape Contractors · Post Falls Landscape Contractors · Tehachapi Landscape Contractors · Wilsonville Landscape Contractors · Woodburn Landscape Contractors · Coronado Decks, Patios & Outdoor Enclosures · Littleton Decks, Patios & Outdoor Enclosures · Renton Decks, Patios & Outdoor Enclosures PRO
PROYardvaark
11 years agolast modified: 9 years agokarinl
11 years agolast modified: 9 years agoDIY_GUY_419
11 years agolast modified: 9 years ago- PRO
Yardvaark
11 years agolast modified: 9 years ago 
woodyoak zone 5 southern Ont., Canada
11 years agolast modified: 9 years agorosiew
11 years agolast modified: 9 years ago- PRO
Yardvaark
11 years agolast modified: 9 years ago karinl
11 years agolast modified: 9 years agomairenn
11 years agolast modified: 9 years agotressa
11 years agolast modified: 9 years agoDIY_GUY_419
11 years agolast modified: 9 years agoDIY_GUY_419
11 years agolast modified: 9 years ago- PRO
Yardvaark
11 years agolast modified: 9 years ago DIY_GUY_419
11 years agolast modified: 9 years ago- PRO
Yardvaark
11 years agolast modified: 9 years ago deviant-deziner
11 years agolast modified: 9 years agoDIY_GUY_419
11 years agolast modified: 9 years agomanifest
11 years agolast modified: 9 years agoreyesuela
11 years agolast modified: 9 years agoDIY_GUY_419
11 years agolast modified: 9 years ago- PRO
Yardvaark
11 years agolast modified: 9 years ago karinl
11 years agolast modified: 9 years agoreyesuela
11 years agolast modified: 9 years agoDIY_GUY_419
11 years agolast modified: 9 years ago- PRO
Yardvaark
11 years agolast modified: 9 years ago DIY_GUY_419
11 years agolast modified: 9 years ago- PRO
Yardvaark
11 years agolast modified: 9 years ago inkognito
11 years agolast modified: 9 years agoadriennemb2
11 years agolast modified: 9 years agoDIY_GUY_419
11 years agolast modified: 9 years ago- PRO
Yardvaark
11 years agolast modified: 9 years ago stompoutbermuda
11 years agolast modified: 9 years agoDIY_GUY_419
11 years agolast modified: 9 years agodonnagwd
11 years agolast modified: 9 years agoDIY_GUY_419
11 years agolast modified: 9 years agoanniegolden
11 years agolast modified: 9 years agoduluthinbloomz4
11 years agolast modified: 9 years agoDIY_GUY_419
11 years agolast modified: 9 years agomelle_sacto is hot and dry in CA Zone 9/
11 years agolast modified: 9 years agokarinl
11 years agolast modified: 9 years agokaren47401
11 years agolast modified: 9 years agoDIY_GUY_419
11 years agolast modified: 9 years agoanniegolden
11 years agolast modified: 9 years agoDIY_GUY_419
11 years agolast modified: 9 years agostompoutbermuda
11 years agolast modified: 9 years agoreyesuela
11 years agolast modified: 9 years agoreyesuela
11 years agolast modified: 9 years ago
Related Stories
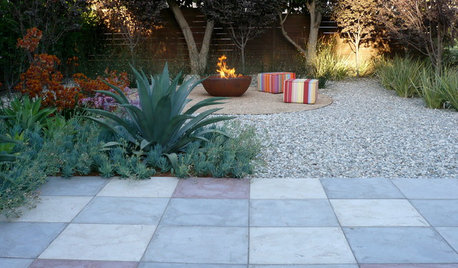
MATERIALSPrecast Concrete Pavers Make a Versatile Surface in the Garden
You can use concrete pavers in a variety of shapes and colors for your patio, walkway, driveway and more
Full Story
HOUZZ TOURSHouzz Tour: Big Bay Views Buoy a Seattle Floating Home
Two glass sides bring spectacular scenes into this newly industrial modern home on the water
Full Story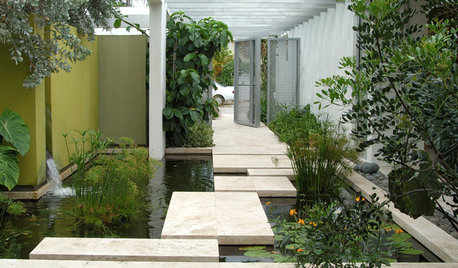
LANDSCAPE DESIGN8 Modern-Day Moats That Float Our Boats
See how a simple water barrier with ancient roots can make for an eye-catching contemporary garden feature
Full Story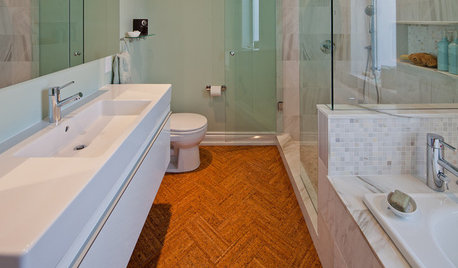
FLOORSWill Cork Float for Your Bathroom Floor?
Get the facts on advantages, disadvantages, costs and installation to see if a cork bathroom floor is right for you
Full Story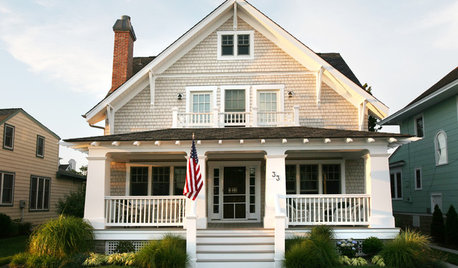
FUN HOUZZHouzz Quiz: What Style of House Should You Live In?
Does your heart belong to midcentury, traditional, farmhouse or something else? Take our quiz to find out
Full Story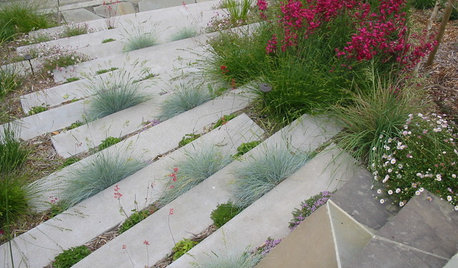
PLANTING IDEASPlant Your Hardscape for Unexpected Green
Nestle greenery among pavers, steps and more for a yard brimming with life and creativity
Full Story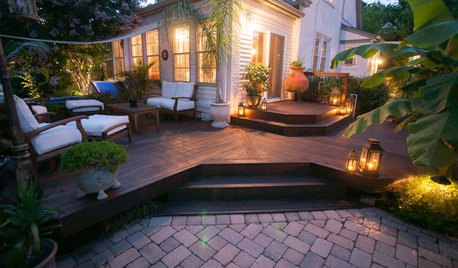
MOST POPULARWhat to Know About Adding a Deck
Want to increase your living space outside? Learn the requirements, costs and other considerations for building a deck
Full Story
DECKSDecking Materials Beyond Basic Lumber
Learn about softwoods, tropical hardwoods, composites and more for decks, including pros, cons and costs
Full Story
MOST POPULAR40 Dogs Who Are Having a Way Better Summer Than You
Houzzers share pics of their canine companions living it up — or getting down with relaxing — on warm days
Full Story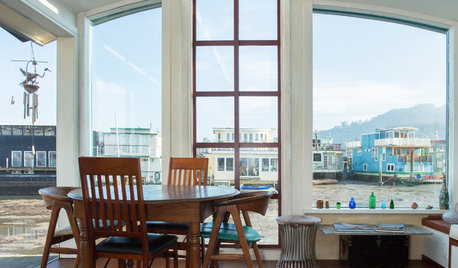
FLOATING HOMESMy Houzz: Gorgeous Views From a Renovated Houseboat Near San Francisco
A couple transforms a floating ‘shack’ in Sausalito, California, into a lovely, light-filled waterfront home
Full StoryMore Discussions


karinl