


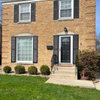
Please comment on my design plans
v1rt
13 years ago
Sort by:Oldest
Comments (86)
Related Stories

You Said It: Hot-Button Issues Fired Up the Comments This Week
Dust, window coverings, contemporary designs and more are inspiring lively conversations on Houzz
Full Story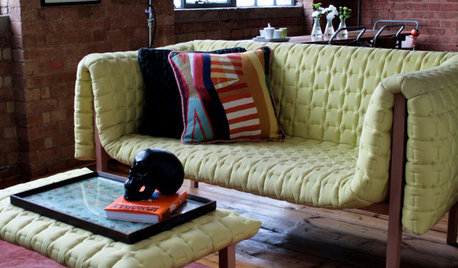
DECORATING GUIDESPlease Touch: Texture Makes Rooms Spring to Life
Great design stimulates all the senses, including touch. Check out these great uses of texture, then let your fingers do the walking
Full Story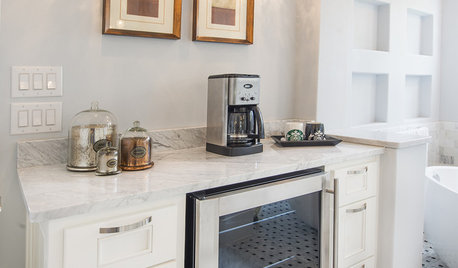
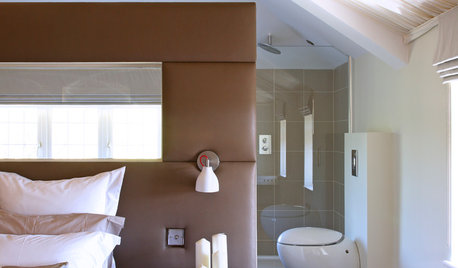
BATHROOM DESIGNUpload of the Day: A Mini Fridge in the Master Bathroom? Yes, Please!
Talk about convenience. Better yet, get it yourself after being inspired by this Texas bath
Full Story
HOME OFFICESQuiet, Please! How to Cut Noise Pollution at Home
Leaf blowers, trucks or noisy neighbors driving you berserk? These sound-reduction strategies can help you hush things up
Full Story
DECORATING GUIDES10 Bedroom Design Ideas to Please Him and Her
Blend colors and styles to create a harmonious sanctuary for two, using these examples and tips
Full Story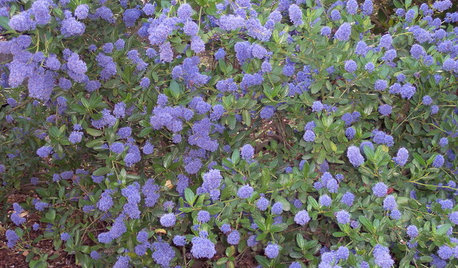
GARDENING GUIDESGreat Design Plant: Ceanothus Pleases With Nectar and Fragrant Blooms
West Coast natives: The blue flowers of drought-tolerant ceanothus draw the eye and help support local wildlife too
Full Story
GARDENING GUIDESGreat Design Plant: Silphium Perfoliatum Pleases Wildlife
Cup plant provides structure, cover, food and water to help attract and sustain wildlife in the eastern North American garden
Full Story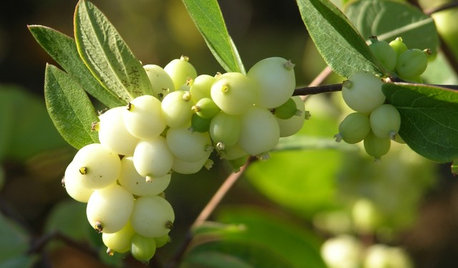
GARDENING GUIDESGreat Design Plant: Snowberry Pleases Year-Round
Bright spring foliage, pretty summer flowers, white berries in winter ... Symphoricarpos albus is a sight to behold in every season
Full Story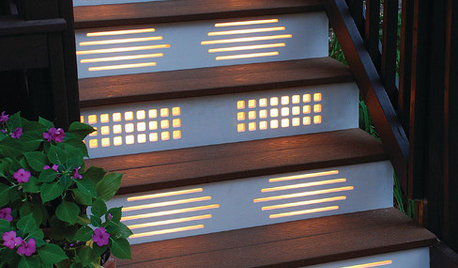
GARDENING AND LANDSCAPINGNo Fall Guys, Please: Ideas for Lighting Your Outdoor Steps
Safety and beauty go hand in hand when you light landscape stairways and steps with just the right mix
Full Story


atjaguarx
v1rtOriginal Author
Related Professionals
Windham Landscape Architects & Landscape Designers · Marco Island Landscape Architects & Landscape Designers · Hilo Landscape Contractors · Middletown Landscape Contractors · Miller Place Landscape Contractors · North Canton Landscape Contractors · Selden Landscape Contractors · Seymour Landscape Contractors · West Chester Landscape Contractors · Dorchester Center Decks, Patios & Outdoor Enclosures · Alvin Decks, Patios & Outdoor Enclosures · Markham Decks, Patios & Outdoor Enclosures · Woodland Hills Decks, Patios & Outdoor Enclosures · Scotts Valley Decks, Patios & Outdoor Enclosures · Buena Park Swimming Pool Buildersv1rtOriginal Author
v1rtOriginal Author
v1rtOriginal Author
botann
v1rtOriginal Author
v1rtOriginal Author
cyn427 (z. 7, N. VA)
v1rtOriginal Author
drtygrl
v1rtOriginal Author
eightzoner
v1rtOriginal Author
timbu
v1rtOriginal Author
v1rtOriginal Author
v1rtOriginal Author
tanowicki
v1rtOriginal Author
peachymomo
v1rtOriginal Author
v1rtOriginal Author
mjjones453
missingtheobvious
v1rtOriginal Author
v1rtOriginal Author
pippi21
v1rtOriginal Author
grullablue
v1rtOriginal Author
dsb22
v1rtOriginal Author
catkim
v1rtOriginal Author
v1rtOriginal Author
karinl
rosa2k10
v1rtOriginal Author
editornj
drtygrl
v1rtOriginal Author
v1rtOriginal Author
v1rtOriginal Author
duluthinbloomz4
v1rtOriginal Author
trovesoftrilliums
v1rtOriginal Author
trovesoftrilliums
v1rtOriginal Author