


Rooting Hardy Kiwi Cuttings
I received a few varieties of hardy kiwi from a grower in Belgium a month ago and potted them right away. I scored the bottom section of the cuttings and dipped them into a liquid rooting hormone before planting them in pots with potting mixture. The pots are in a large clear plastic container with clear lid that works very well to keep humidity high. It sits in a south facing window which gets a lot of light. All the cuttings have leafed out, a couple even with flower buds, but there are no roots yet on the ones that I checked. Its been about 4 weeks.
I just wondered if I should apply more rooting hormone to the cuttings or just leave it be. Could that harm the cutting?
Comments (44)

Scott F Smith
16 years agoI think you are too late now. You also made a mistake in having the tops so warm -- you need cold leaf buds and warm roots. If you have any more cuttings I would recommend grafting them, its a much more reliable method. I tried rooting a couple kiwis like you are doing, without getting the cold tops/warm roots, and had 0% success.
Scott
Related Professionals
Harrison Landscape Architects & Landscape Designers · Lyons Landscape Architects & Landscape Designers · Piqua Landscape Architects & Landscape Designers · Sand Springs Landscape Architects & Landscape Designers · Goodyear Landscape Contractors · Hartford Landscape Contractors · Surprise Landscape Contractors · Arlington Landscape Contractors · Columbine Landscape Contractors · Gloucester Landscape Contractors · Lantana Landscape Contractors · Old Saybrook Landscape Contractors · San Bruno Landscape Contractors · Sun City Center Landscape Contractors · San Pablo Landscape Contractors
lucky_p
16 years ago"Kiwi don't usually root worth a darn from dormant cuttings. Most are started from green cuttings in a mist bench with bottom heat. In that setting they will root in about two weeks. It is sometimes possible to push a small shoot from a dormant cutting, then put that shoot into a mist bench system and succeed." - L.Rombough
I looked back through my archived NAFEX discussions, and found this one from the folks at Kiwi Korners(www.kiwberry.com):
"Hardy Kiwi Propagation:
If you are working with young plants, you should get several shoots that grow from the original woody vine. You should train one of the larger shoots, as a trunk, up the bamboo to the top wire. A second shoot can then be arched from the ground, back into the ground, and then up again (this is a type of "layering" process). The buried portion of this alternate shoot will produce roots within a growing season, but it will also extract vigor from your primary vine. Eliminate the remaining shoots.
The method in which we have achieved the most success is:
Utilizing "pencil sized" diameter scion wood cuttings which should be taken in late spring. Select non-flowering, vegetative growth that is 12 inches or more in length, and has started to harden off. They should be 5 - 6 inches in length, which will have approximately 5 buds/nodes. You can accelerate the hardening off process of young shoots by nipping the end off, and waiting about one week.
Rule of Thumb - If you can crush the cutting in-between your thumb and your index finger, it's too early. As the soft green shoots mature, they will develop a waxy like coating. The shoots at this stage will be stiff enough to push into rooting medium without bending.
Remove all of the leaves from the cutting except for one leaf at the top and cut that leaf in half. At the bottom of the scion wood, cut entirely across the last bud/nodule diagonally. The scion wood can be dipped in rooting hormone and placed in a 50/50 mixture of perlite and vermiculite. Keep the cuttings in the shade and water frequently. You should achieve a transplantable root ball within six weeks. We have achieved a 6 foot high trunk with cordons established within two years. The plant should flower in its third year."Here is a link that might be useful: Cornell Minor Fruits - Kiwi
tyler_j
Original Author16 years ago"Kiwi don't usually root worth a darn from dormant cuttings. Most are started from green cuttings in a mist bench with bottom heat. In that setting they will root in about two weeks. It is sometimes possible to push a small shoot from a dormant cutting, then put that shoot into a mist bench system and succeed." - L.Rombough
.... I actually did that last year with an Arctic Beauty kiwi. The cutting didn't root so I cut off the 8" growth, planted it and it rooted. I might try that with these if the shoots grow out long enough.
chills71
16 years agoLast thing you wantt o hear, but I'll add my experience to the others.
I've had no luck rooting dormant cuttings, but I did have a little luck with the grafting described above. I didn't root the growth I got, though so my efforts were eventually for naught.
I did save one of the cuttings I had ordered in the fridge and though its been a year already it still is green and moist when I scratch. i'll try again this spring.
If you need more cuttings, ask in the spring I'm sure either I or another poster will be able to supply them.
~Chills
kiwinut
16 years agoTyler,
I did the same thing with A. melanandra a couple of years ago. I just placed the cuttings in water and forced the new growth, then took green cuttings when they were 2-4 inches long. I found that leaving about an inch of the old wood attached to the base of the green shoot, which should support the shoots longer, was important for this to work for me.
I have also found an easy way to root summer cuttings. Instead of using green shoots under mist, you take semi-green wood and cut it into 1-2 inch pieces, each with a single inactive bud at the base of a leaf. You then "plant" the cuttings horizontally a couple of inches deep in potting soil in a seed starter with the single leaf sticking out, and place in a warm spot. The seed starter is the type that wicks up water from a reservoir and has a humidity cover. The buried bud usually will not push new growth until roots start to form. The leaf supports the cutting and probably suppresses the growth of the dormant bud. Once roots develop, the bud breaks and the new shoot will push up through the soil and take off.
~kiwinut
tyler_j
Original Author16 years agoThanks for the info guys. Thanks for the offer of cuttings Chills but I'm actually expecting more cuttings today delivered by fedex. These first ones though were from Belgium. They were Wieki, Wieki Purpurea, Mafil, and Tanny plus a chenensis variety First Emperor Yellow. They are still hanging in there so I will see what happens with them. I cut off some of the growth and planted them separately and a couple of the original cuttings have new shoots starting now which surprised me after almost 6 weeks of being planted.
In regards to keeping the leafs cold and roots warm thing I founds some articles where people bury the cuttings upside down (it was about grape vine cuttings) in the fall so that in spring the root section was warmed being closer to the surface while the leaf section stayed cool deeper in the ground. Now here in Ontario you can't do that with cuttings received in the dead of winter when the ground is already frozen but I had an idea last night as I was down in my chilly unfinished basement.
What if you made a 2 tiered insulated box container. The bottom one wouldn't have a top or bottom so that it is open to the concrete floor and open on top for the 2nd warming chamber with cuttings protruding through. If the rooting end only needs heat and not sunlight then an artificial heat source could be... carefully.. installed in the upper chamber. Maybe a low wattage light bulb with proper venting to maintain a good temperature.
I put a thermometer in an enclosure on the floor and overnight the temperature was about 10 celsius. I put a blue icepack in it and several hours later is was down to about 5 celsius. I wonder if that kind of setup would work?? At least it might give the rooting end a couple weeks head start while saving the energy of the cutting. Any thoughts? Anyone tried a different method of warm/cold rooting??
I've never tried grafting but may attempt with a couple of them.

axier - Z10, Basque Country (Spain)
16 years agoWith hardwood kiwi cuttings rooting, the use of rooting hormones is a must. It is frequently recommended 4.000 to 5.000 ppm IBA to get any chance of rooting. Without hormones it is near an "impossible mission".
On the other hand, Scott is right, grafting is an easier task with kiwis and you will do a better use of the cuttings. If you graft with chip budding you will only need one bud. The cons are that you will need a kiwi plant available (obviously!) and you will have to wait and keep healthy the cuttings until late spring to graft with guaranties.
The Kiwinut method of forcing in water to get green cuttings is very ingenious, I didn't know it, maybe it is a good alternative.
axier - Z10, Basque Country (Spain)
16 years agoThank you for the information and pictures. It is very interesting.
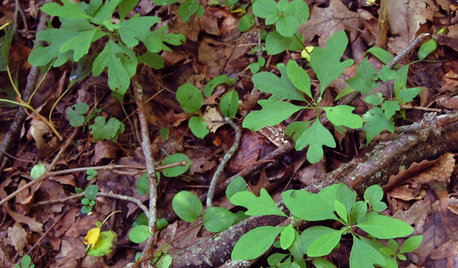
It is an Actinidia arguta, right? As far as I know it is easier to root than A. chinensis or deliciosa. If you are going to try new rootings with any of them, I would be very interested in your progress. Please, let us know.
Thanks.
tyler_j
Original Author16 years agoAxier, yes these are Actinidia Arguta cuttings. I will keep you posted as to my progress with the others.
kiwinut
16 years agoExcellent! Glad to see someone repeat this. I have only done it with arguta and melanandra, but I have not tried it with chinensis or deliciosa. I may go out and take a couple of chinensis cuttings and see if I can get it to work with them as well.
~kiwinut
axier - Z10, Basque Country (Spain)
16 years agoI am going to try with cuttings of Actinidia chinensis "Jinfeng" that I stored weeks ago in the refrigerator. "Jinfeng" is already sprouting and it shows little leafs. Obviously, it is not dormant and I can't take cuttings from it now.
tyler_j
Original Author16 years agoI've taken some cuttings of new 3" growth from some other dormant cuttings and put them in the same 50/50 mixture of perlite/vermiculite with liquid hormone at the base of the new growth. Some of these cuttings are turning black and eventually rotting at the base. Since the rooting medium is not too wet and I think it might be because the new shoot had not hardened off enough when I removed it after about 3 weeks growth. The other cuttings I have left alone the growth has slowed and I might snip the end to help it harden itself off before attempting to root them. I think the longer you can let the new shoot grow the better the chances of rooting it later on.
axier - Z10, Basque Country (Spain)
16 years agoThanks for the advice, I will take into account.
I actually have several "Jinfeng" cuttings in water (only 2" of the cutting bottom). At the moment the buds seem to be swelling. It probably will take several weeks to have shoots.tyler_j
Original Author16 years ago{{gwi:61223}}
Well well well..... I noticed that the majority of new shoots were not growing out very much as you can see in the picture. Hoping to root the new growth if it grew out more I thought I take a look at the dormant cutting end to see what was going on if anything. ROOTS!!!!
I proceeded to check the rest. I have cuttings from 18 varieties and 12 of them have begun to root. It appears that they have begun to root over the last couple days. The other 6 that have no roots still look healthy with a lot of callous buildup but since the others just started I'm hoping these ones will follow shortly.
So these dormant cuttings only took 2 1/2 weeks before rooting. So looking back to the cuttings I rooted in January that all failed (eventually rotted) the only difference was the rooting medium. In the first ones I used a peat-based potting mixture and with these cuttings I used 50/50 vermiculite & perlite. I wonder if the better aeration with this mixture initiated the roots to develop? Maybe potting soil either retains too much moisture or does not allow the dormant cutting to "breath" as well as this mixture does. So I think I will abandon cutting off the new growth of these unless things take a turn for the worse.
So just to recap what I did with these ones, I mixed 50/50 perlite & vermiculite for the rooting medium. I took the dormant cutting and cut off the bottom so that there was a node about an inch or less from the bottom. I used and exacto knife and removed a small strip of bark from the node down just to expose the green tissue below. I did it on the opposite side as well so there were 2 exposed strips at the base of the cutting. I applied some liquid rooting hormone (0.4% IBA) to the bottom and wounded areas and place the cutting in the mixture. I watered them good and let the excess water drain out the bottom. The pots were put in a large clear plastic container with clear lid that closes. I put it in a south facing window about a foot overtop of the floor register. The window has a white sheer to reduce the sunlight but still offers good brightness. The temperature inside would fluxuate during the day from 20 to 30 degrees Celcius. I open and the lid daily checking on them which refreshes the air inside the container.
Thats about it. Hope others have success rooting these as well.
logrock
16 years agoGood ideas here!!
Tyler, just to be even more clear what you did with the dormant cuttings.
---------------------------------------------
1st Clarification:
The last picture of the 5 or 6 node rooting cutting with green leaves on the other end.... is that the one you described in the last paragraph of that same posting?
---------------------------------------------
2nd Clarification:
On the posting with the picture of the 2" dormant cutting with one node and that greenish root mass coming out of the side of it. Did you say all others like it died?... If so do you they died of fungal attack from a non-sterile rooting medium and too much water? That method appears to be very efficient so what to you think you could have done differently to have success with that?
----------------
Thanks,
Rontyler_j
Original Author16 years agoHi Ron. Sorry for the confusion.
1st.. yes that is the same cutting as described in that same post with the picture. The horizontal dormant cutting. It was planted the weekend of Feb. 15th.
2nd.. The other dormant cuttings that those 2 new growth cuttings were taken from were originally potted the first week of January. I took the cuttings after about a month. The other dormant cuttings and their growth died with the bottoms turning black and mushy. It could have been the unsterilized potting mixture or maybe they were too wet but I didn't think they were. I took the new growth cuttings from the others too but they were showing signs of not doing well when I took them and they died. These 2 of 4 arguta new growth cuttings were the only ones that rooted from my January dormant cuttings.
With the dormant cuttings I planted on Feb. 15th I took cuttings after about 2 weeks and I think that was too early and the shoots were too tender. About half have turned black and rotted. Again I did not sterilize the vermiculite/perlite mixture. I believe waiting as long as you can as long as the dormant cutting is still healthy gives you the best chance to root the new growth. Maybe the .4% IBA solution is too strong for new shoots that haven't had a chance hardened off enough?? Sterilization probably would have been a good idea though in any case.
axier - Z10, Basque Country (Spain)
15 years agoTyler, the past winter I tried your method and, unfortunately, it didn't work for me. The cuttings roted before the shoots were big enough.
However, I have just rooted two cuttings of Chinabelle variety (A. chinensis) following the kiwinut's mehod and it works fine! Thanks Kiwinut!:
"I have also found an easy way to root summer cuttings. Instead of using green shoots under mist, you take semi-green wood and cut it into 1-2 inch pieces, each with a single inactive bud at the base of a leaf. You then "plant" the cuttings horizontally a couple of inches deep in potting soil in a seed starter with the single leaf sticking out, and place in a warm spot. The seed starter is the type that wicks up water from a reservoir and has a humidity cover. The buried bud usually will not push new growth until roots start to form. The leaf supports the cutting and probably suppresses the growth of the dormant bud. Once roots develop, the bud breaks and the new shoot will push up through the soil and take off." Kiwinut.
Here you can see the roots on the wall after 31 days. Regarding the photo I want to clarify one thing, despite the appearance, the white points in the substrate aren't perlite, it is condensed water reflecting the flash light:
{{gwi:61224}}
logrock
15 years agoBump!
Has anybody had reliable success propagating Hardy Kiwi from dormant root cuttings. Why I ask is for plant exchange it is easier (and a lot cheaper) to ship dormant cuttings than rooted plants in pots. Also semi-hardwood, which seems to be the preferred material, is relatively fragile for shipping during early summer when it is available.
I would really like to pick the brains of someone who successfully roots these plants in the winter when lots of cutting are available since they get major pruning/shaping at that time.
Thanks,
Rontyler_j
Original Author15 years agoHi Ron. I had mixed results with mine. Although a majority of my cuttings started rooting in 3 weeks or so about 60-70% of them eventually rotted shortly after from the bottom of the cutting which eventually got to the roots. I wonder if I wounded the cutting too much during the rooting hormone application which might have lead to rotting possibly? Either that or things were just not sterile enough.
The other method of rooting the new growth I think is more promising and reliable. I had some success that way. When I try again next spring I am just going to put the cuttings in water as kiwinut suggested and force as much new growth as possible and use that to root. The more growth you have to work with the better.
tyler_j
Original Author15 years ago{{gwi:61225}}
Well its another year... thought I'd try again. Last year I had luck getting the cuttings to root quickly but the ends rotted shortly after. I think I either wounded them too much or had them too damp.
These cuttings are about 2 weeks after treatment. All of them have formed roots. Again I used a 50/50 mixture of perlite & vermiculite as I think it provides better aeration and doesn't trap too much moisture. This time I dipped the ends of the cuttings in wax to try to keep moisture from the exposed ends. I didn't wound the cutting as much this time either. I made 3 or 4 small upward angle cuts into the vine and applied liquid rooting hormone. (Last year I took 2 strips off each side of the vines that looked harmless at the time but once the hormone activated the callous growth it literally split the bark in half off the vine which I think might have been my problem with the rotting.) I watered the cuttings and let all excess water run out. Placed pots in a tray with some water on the bottom and covered the container with clear plastic to keep humidity up.
Now lets see if they keep growing without issues lol. I will post follow up pics as they progress.
Tylertheaceofspades
15 years agoIn a couple weeks I am going to prune and root my Arctic kiwi. Currently the heat mat is full of fig cuttings that need to go into larger pots. For the Kiwi I am using vermiculite and cut off 2 liter soda bottle for the pot and lid. On the cuttings I use Clonex and a pinch of Captan into the watering can.
logrock
15 years agoTyler: that appears to be excellent root development on that "red" picture, and on relatively skinny cuttings. I would think they would all take off from there if put in somewhat fertile soil and kept warm and misted. Did they? Also when you said "3 or 4 small upward angle cuts into the vine" do you mean short, lengthwise cuts into the bark just to let the liquid hormone get past the bark? And is that where the little root primordia first poked through?
Ace: how are those arctic Kiwi's coming?
This is a good thread, so y'all keep posting your progress and I will too. I have a batch going now in my outdoor growbox with bottom heat, clear lid and automatic misting, but this will probably be my last winter attempt since I'm convinced that using early summer, firm-wood will be a lot more successful. I will post a few pictures soon if anything grows.
-Ron
burkiwi
15 years agoim currently trying my hand at propagating cuttings from both annasnaja and meader male. i took dormant cuttings back in the beginning of febuary.i then waxed both ends and put cuts in the bottom of all of the cuttings. i then wet them and dipped them in a powdered roottone. i then placed them in a mix of perlite and vermiculite. i used terra cotta pots and cut the bottom of gatorade bottles. i put the bottles over the top of the pots. low and behold i have just discovered i have roots but no tops on the males and tops but no roots on the females. anybody out there have any idea on what gives?
tyler_j
Original Author15 years agoRon,
About half the cuttings survived and are doing well. In reference to the upward angle cuts they were horizontal cuts angled upward. The hormone makes the entire area "swell" up and splits the bark a bit. The roots form out of the white callous from these areas. I think the biggest key is to not let the rooting medium get too wet especially when using a Vermiculite based medium. The cuttings that rooted the best were in pots that felt like they had no water in them at all. But when you felt the vermiculite it was damp and I think that is all that they need. Other containers "wicked" up excess water that accumulated in my rooting chamber which in turn made it too wet and the roots failed on those ones. Summer rooting is by far easier but these were cuttings of varieties I did not have that were sent to me.Burkiwi,
As long as the male cuttings are rooting thats a good thing. The growth should start at some point. If the the others don't show any signs of rooting in the next few weeks I would try Kiwinut's suggestion of cutting off the new growth leaving a small section of the dormant cutting for support and try to root the new growth.logrock
15 years agoTyler (and others),
It looks like you are trying as hard as me but you have had at least some success. I've been loving mine to death: never have seen a root on any of my 100 or so dormant cuttings I've tried over the last two winters. But I still have a chance this year.
So, what I see you doing "right" in theory (according to what I've read) and what I can still adjust this year is:
1. Lower concentration of rooting hormone. I get plenty of swelling/splitting/callus but no root formation before death. Are you using diluted Dip N'Grow? I've been using mine full strength since I'm under the impression that dormant Actinidia is in the "hard to root" category.
2. Lower level of bottom heat. Some of mine are turning black and fractured on the bottoms even before the buds break. I will put a spacer between the heating mat and the flats and make sure that the bottom of the stems are not touching the bottom of the flat. A consistent 70F is probably better than 90F.
3. Lower moisture in the medium. I think I realized that last year and they are not rotting nearly as much as last year. "Moist" is a very imprecise term: I'm thinking the medium should be only slightly more moist than the inside of the stem, and it should be loose enough to have tiny air pockets but just stiff enough to keep the stem from flopping around.
This evening I'm going to trim off some of my most recent batch, re-wound, re-dip and re-stick. I'm also going to try to redo horizontally some of the older ones that have healthy green growth, but dying bottoms.
It seems that rooting of dormant cuttings is an art that may require an apprenticeship and someone to "show me" how it is done. It's all in the details of your technique and once you (we) find a system that works, then it will all make sense.
One thing that I think I have right is the humidity. I put together a misting timer, solenoid valve and fog nozzles inside my "hotbox" in the shade and can pretty much keep it at 90-100 humidity without being dripping wet (10 sec every 10 min for example). But on a small scale, the round terracotta pots with gatorade humidity chambers might even be better as long as they get fresh air once in a while.
Everything I've said to this point is strictly theoretical since as I said at the beginning I'm putting a lot of thought and experimentation into this with zero success so far. By comparison, a couple of summers ago, I cut off some random greenish stems during the summer, cut off some of the leaves, stuck them in some pots, put them in the shade and watered them once in a while and half of them took root within a month. The reason why I need this to succeed is because one of my sources will only send dormant cuttings.
So if there are any experienced lurkers out there please feel free to lend your advice.
Thanks,
Ronaxier - Z10, Basque Country (Spain)
15 years agoRob, very interesting your comments and perseverance.
I have tried (not so many cuttings as you) the three main propagation methods for actinidias; hardwood cuttings, greenwood cuttings and grafting. By far, the easiest are greenwood cuttings and grafting.
Being hardwood cuttings your only source for propagating, IMHO, I would spend my energies to try grafting, it is a more rewarding technique than rooting to propagate hardwood cuttings.logrock
15 years agoGreat idea Axier, I should have done that earlier. I have three well established plants that could serve as hosts, but they are growing vigorously now and I think the graft might not take due to the high flow rate of sap.
Our climates are not that different, would you do that now or put the cutting in cold storage until early summer? It will be worth the risk as long as I don't damage the host and all I need is a couple of buds from each different new cutting variety. I see earlier you had recommend a chip-bud graft. With the "T" cut on the host right? I'll read up on that. My plan would then be (if the graft "takes") to use some the new healthy semi-hardwood later this year or next to start a rooted plant of each of the new varieties. Any other tips?
Thanks!
RonHere is a link that might be useful: Bud grafting description
axier - Z10, Basque Country (Spain)
15 years agoRon, I have tried "T" bud and whip-grafting with kiwis but I didn't achieve good results. The best for me is Chip-budding in May-June with buds stored in the fridge. In June the new wood is hard enough to graft, it takes easily on those branches of the season. If the graft takes, the bud sprout in few weeks and it can grow vigorously until the autumn.
There are a lot of information out there about chip-budding and in this forum.
Good Luck!tyler_j
Original Author15 years agoOne last test for the year. These cuttings were taken off my vines on April 1st before any signs of growth. Wounded and treated with the liquid hormone shown in the picture. I didn't wax the ends this time. This picture was taken 19 days later. Half of the cuttings I tried formed roots. Maybe its the brand of rooting hormone??
Here is a link that might be useful: {{gwi:61214}}
logrock
14 years agoTyler,
For that last April 1st dormant cutting, did you use your same indoor humidity chamber you described earlier? If so, did you ever mist them? Or apply bottom heat?
Are they still growing?
-Ron
tyler_j
Original Author14 years agoSorry Ron I missed your post. Yes I used the same indoor humidity chamber - a clear plastic rubbermade container with lid with the pots inside. I misted them every other day or so. It sat under a south facing window that received bright light but no direct sun due to the porch roof. There was also a register vent there for heat. No other bottom heat was used but the temperature would be in the mid to high 20's C. I just kept one of them growing and discarded the rest as I have these varieties already. It seems to be growing fine. It was more just for the rooting test.
Tylerlogrock
14 years agoIt looks like my plants are getting to the stage to try kiwinut's horizontal summer technique. So I took some pictures this morning:
{{gwi:61226}}
Stage 1: The nodes are swollen and the stem seems to be hardening a bit based on the appearance of brown spots. This sample is from close to the main "trunk".{{gwi:61227}}
Stage 2: You can see a spot where the node is forming and the bud is mopre swollen. This is a bit closer to the terminal end (which was nipped off 1-2 weeks ago).{{gwi:61228}}
Stage 3: Here, the bud is actually growing so obviously enough cell differentiation has taken place, but maybe too late. This stem section may be a bit greener.So I think the Stage 1 is the best, but what do y'all think? Maybe they will ALL work in a good humidity chamber with lots of light and new clean medium that is not too wet. I will try all stages and try to keep good records.
For those of you who were successful with this (or any summer method), did you use any rooting hormones and or fungicide? What about using the coarse sphagnum moss (not the fine brown stuff) which reportedly has natural antifungal properties?
{{gwi:61229}}
By the way, here are the trays I'm planning on using. I can keep a bit of water in the bottom to wickup as needed and cover all the pots with a large plastic box under lights. But I don't think I will put the cuttings a full 2" deep.Thanks, Ron
kiwinut
14 years agoRon,
Those trays are different than what I use, but as long as the cuttings don't get too wet or dry out, it should work. The trays I use are for starting seeds and have a fabric wick that runs under the holes with the soil, and down into a water reservoir, so the water is constantly wicked up very slowly directly into the soil. They also have a humidity dome.
Any of those shoots should be good to try.
logrock
14 years agoThe beginnings of success!
Here's a picture of a rooted stem cutting from a cellpack:
{{gwi:61230}}
The medium was damp 1:1 Peat:Pearlite in a 1" square cells. The bottom end was quick dipped in Dip'N Grow diluted about 50% (with some gel powder added), but I actually had a higher percentage of success with the hormone powder (IBA or NAA worked equally well). Most of the DNG gel dipped ones rotted and I'm starting to think that stuff is only meant for dormant woody cuttings The callused like crazy but had almost no roots. My second batch of cuttings are all using a mixture of the two powders and some are wetted with the Willow Tea and I expect a higher success rate. Also my outdoor shaded misting box (with drainage through the cellpacks) worked better than the enclosed humidity chamber. The box has more headroom with more air circulation. The mist controller (with fogger nozzles) is set so go 5 seconds every 10,15 or 30 minutes depending on outdoor air temp and humidity. I like the DIG 2GPH fog nozzles.
Here's a picture of some successful growth following kiwinut's technique.
{{gwi:61231}}
This way is a bit more touchy for moisture control and a more sterile starting medium I think because the leaf petiole is actually sticking up through the soil, so if it starts damping off, it's over. But it does work! These were started 2 each in the long cells from my previous post, and placed in a humidity chamber (upside down clear tote) under florescent lights in the shaded shed (never got above 85F). The rooted ones were transfered to these 4" pots containing Jungle Growth soil for food.
In other news: I started a blog about our gardening experiences over the last few years and will lead up to a behind the scenes look at starting a small nursery. I'm going to specialize in Antinidia Arguta and start out small, sell a few very healthy plants and have a nice orchard. It is called KiwiGrower and you are all invited to read and comment.
Thanks for all the great ideas and info..
-Ronkiwinut
14 years agoRon,
Nice roots! I have also seen a lot of rot if I use the DNG too strong on green cuttings. I find that 5-10% works well with semi-green cuttings. The 50% seems to kill dormant woody cuttings as well, with both kiwis and grapes.
I have started rooting my cuttings under mist using expanded clay balls for the medium. These are sold for hydroponic systems and don't absorb much water, but let in plenty of air. My system is set to mist for 20 seconds every 15 minutes. So far, it seems to be working well. The larger woody cuttings have done best.
Your blog looks good too!
~kiwinut
tyler_j
Original Author14 years agoHas anyone tried Gibberellic Acid to get dormant cuttings to root? I received several long kolomitka cuttings from a fellow kiwi grower and initially just put them in jars with water to force new growth (I was going to try to root the new growth). I had them in the jars for about 2 weeks when I decided to try a gibberellic acid solution. The new growth was between 1 and 2 inches on the cuttings at this point. I mixed approximately 50 mg of GA in approx. 250ml of water last night and put the cuttings in that solution. This morning I was checking on things and in one of the jars there were 3 cuttings that all had started rooting at every node on the 10" cutting!! (even those above the water level and even on ones with 2" growth.) These were definately not like this last night. Some of the roots were 1cm in length that grew overnight.
I've sectioned them and potted them to see if they will take root but wanted to share this with others trying to get these to root.
logrock
14 years agoThat's amazing Tyler!
How much of the stem was in the GA solution? It's amazing how the different concentrations of hormones affect the plants so differently, and the more I try things the more I realize that less is almost always the way to go. Everything I've read (until now) about GA is that it stimulates top growth and seed sprouting, but there are cases where GA and IAA together in weak concentrations will stimulate root formation more than IAA alone. I may try that, thanks!
-Ron
tyler_j
Original Author14 years agoHi Ron. The stems were in about 3" of the solution. Since posting that no others have sprouted any roots so I'm not sure what to think. The ones that started rooting were smaller in diameter than the rest. I've taken some of my own arguta cuttings and placed them in the same jar to see if the solution does anything on them.
logrock
14 years agoThat's amazing Tyler!
How much of the stem was in the GA solution? It's amazing how the different concentrations of hormones affect the plants so differently, and the more I try things the more I realize that less is almost always the way to go. Everything I've read (until now) about GA is that it stimulates top growth and seed sprouting, but there are cases where GA and IAA together in weak concentrations will stimulate root formation more than IAA alone. I may try that, thanks!
-Ron
logrock
13 years agoTyler, I bet those 10" cutting with 3" under water had done all their callusing and cell differentiation and the root pimordia cells were already formed. Then that weak Gibberellic Acid solution just stimulated their elongation since one night is not enough time to create totally new root cells. That makes sense to me, but I may be wrong. I may get some GA and try another experiment this late spring to increase my success rate with the semi-hardwood cuttings.
Did you have any hormone in the initial water bath or did you sterilize the cuttings with alcohol or anything?
As a reminder (to myself mostly): DipNGrow has alcohol, NAA and IBA (and water) in it. The purpose of the alcohol is to kill "germs" on the surface of the cutting and dissolve the hormones.
elliottg_uw_edu
13 years agoHi Everyone,
I am from Washington State and last year I tried to plant some artic kiwis, but unfortunately i let my chickens get into them and they pretty much destroyed them. I would like to start again and i was wondering if anyone would be willing to send me some cuttings for male and female plants in exchange for some top quality pea, bean, or sweet corn seed. I run a thousand acre vegetable seed farm that specializes in those type of things. I also have a little onion seed if interested. All of my seed is 90% germ rate or higher. let me know if you are interested and what you would like to trade.
Thank you


tyler_jOriginal Author