


Okay plants for pots with no holes
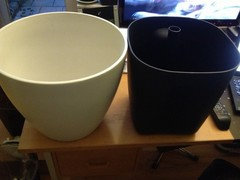
I have two nice glazed ceramic pots which don't have drainage holes (I know this isn't ideal, but there wasn't a lot of selection at Home Depot). I have a jade plant in one and a dracena in the other. When I potted them about two years ago I used a bunch of pebbles at the bottom and some activated charcoal. Until a couple weeks ago, both plants were healthy and growing fast, but recently the jade has gotten sort of droopy and some of the leaves are yellowing and falling off. From internet research it seems like root rot or suffocation and that I need to re-pot it in a pot that will allow the water to flow through. Anyway, my question is about these hole-less ceramic pots--what kind of plants will tolerate living in them? I don't want to throw them away because they are pretty and were expensive.
Comments (44)

rhizo_1 (North AL) zone 7
12 years agoYou'll never be able to water properly without drainage holes.
The typical suggestion is to plant into a pot with holes and use the ornamental container as a cachepot. Then you can remove your plant to water thoroughly and replace it back into the pretty pot when it's done dripping. Other options include using the proper drill bit to make holes yourself...or to return the pots.
Related Professionals
Ashland Landscape Architects & Landscape Designers · Eden Prairie Landscape Architects & Landscape Designers · Aurora Landscape Contractors · Brentwood Landscape Contractors · Dickinson Landscape Contractors · Huntley Landscape Contractors · Mason Landscape Contractors · Mequon Landscape Contractors · Mission Bend Landscape Contractors · Plymouth Landscape Contractors · Ringwood Landscape Contractors · Waipahu Landscape Contractors · Welby Landscape Contractors · Shafter Landscape Contractors · Whitman Interior Designers & Decoratorspirate_girl
12 years agoHiya Dorie (Rhizo),
I'd started writing a post abt using these pots that have as cache pots, but had some 'puter trouble here in the office & had to abandon that effort.
plantomaniac08
12 years agoI had some plastic pots that didn't drain, I ended up drilling holes in the bottoms. I tend to avoid any non-draining pots as I also find it difficult to water them properly, it's hard to know when you're drowning them.
dellis326 (Danny)
12 years agoFor drainless ceramic pots you only have a few practical long term choices, The simplist is to place a smaller pot with the plant, into the larger one and then it just catches the water draining from the planted pot. Drop a few marbles or packing peanuts in the bottom of it so the smaller pot doesn't sit in the water.
The second would be to drill a hole in the bottom with a masonary bit or better yet a diamond bit made for drilling tile or glass, Not as hard as it sounds. Some ceramics actually become harder as they heat up so dribble a little bit of water on the tip of the bit as you drill.
Or you can grow plant semi-hydroponic in them by washing all the soil off the roots and then trim the roots, and then replacing the soil with a ceramic media, rock-wool, wood chips or even sphagnum moss (Not PEAT) and only watering enough to keep an inch or so of water sitting in the bottom of the pot at all times but even with this method it is best to drill a small hole in the side of the pot at the maximum height you want the water to be so you can still flush it now and then.
Danny

Tiffany, purpleinopp Z8b Opp, AL
12 years agoNot that any of the above advice isn't excellent, but...
When I potted them about two years ago I used a bunch of pebbles at the bottom and some activated charcoal. Until a couple weeks ago, both plants were healthy and growing fast. The soil of plants that are unable to drain can retain salts and other chemicals from tap water and eventually reach toxic levels. You may have had a whitish orange "crust" around the top of the soil and the pot near the top of the soil. Or did something about the plant's environment recently change?
It sounds like you were caring for your plants well, and there is no reason to think that they couldn't go back into the pots. I would wash and rinse the pots well, rinse as much soil as possible from the roots, and pot them back up with fresh soil of the same type as before. Two years is a good run between repottings of a fast-growing plant even if it did have drain holes.
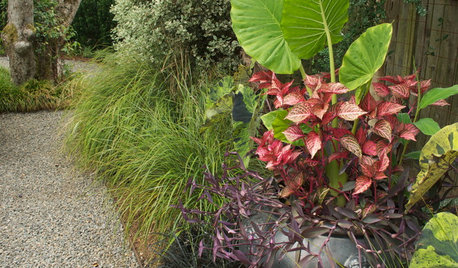
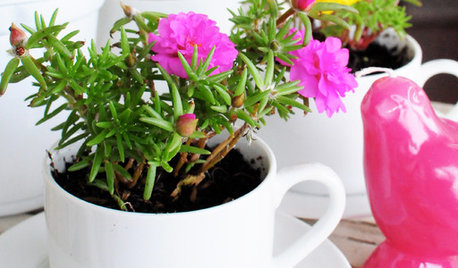
If you have decided to relocate these plants to other containers, you might consider some type of cactus or other desert-type plants which like to stay dry.
dellis326 (Danny)
12 years agoOK, These instructions are for people who don't handle tools very often, If it is too detailed for anyone, too bad.
Ceramic pots can be drilled using a masonry bit, Diamond burrs or hole saws or carbide glass and tile bits or hole saws which can all be bought at many hardware stores and home centers. Diamond and carbide bits are sold primary for drilling tile.
Go slowly with moderate pressure letting the cutting tool do the work. You can use a regular drill, corded or cordless but cordless is safer. If you have a hammer drill make sure the it is set for regular drilling.
Stack up a bunch of small wood blocks that will fit inside of the pot and place the pot upside down with the blocks in the pot holding it up enough so that the rim of the pot is not touching the work surface. These blocks will help to keep the inside of the pot from breaking out.
Pour just enough water on the bottom surface of the pot to cover it. Start drilling, letting the weight of the drill be the only force on the cutting edge of the bit, If you push it hard or wobble it back and forth you might break the pot. The water will help keep the drill from getting too hot, some types of ceramics get harder as they heat up plus the bit can get hot enough to burn. You may need to add more water, it may splash off the pot, Take the drill off and pour a little more on it or use a small watering can and drip a little bit in a constant stream while drilling if you are comfortable holding the drill with one hand.
Stop when you feel it cut through, you may chip it up if you keep spinning the bit after the hole is cut.
Or you can just show the pots to your local tile guy (or gal) and see if they can cut them for you.
Joe1980
12 years agoDellis hit it right on the head. I've drilled many ceramic pots for the same reason; they were nice pots, the ideal size I wanted, and, well, I just plain out wanted them. But, as I'm sure all of us have discovered, the people who make these pots don't seem to know much about growing actual plants in them, because they never put holes in the bottom. I do exactly as Dellis said, that is using a masonry bit. I have an adjustable hammer drill, being able to adjust the hammering strength from none, to full out pounding. With no hammering power, a masonry bit isn't sharpe enough to cut, so I add just a touch of hammer action. I know though, who the heck else is gonna have such a tool? So, if I wasn't a tool guy, and work didn't give me a truck stocked with all the tools a guy could want, I would opt for the diamond hole saw/drill bit made for cutting tile.
Joe
dellis326 (Danny)
12 years agoOh yeah, one thing I forgot.
Do this outside unless you enjoy cleaning. It can throw little drops of dust filled water several feet away which may not be easy to clean off some surfaces.
birdsnblooms
12 years agoDanny, thank you. Great info. We have a drill (electric and cordless) and masonary bits. I didn't know about the water, so when I attempt this project, I'll make sure to have a container of water handy.
Joe, you're lucky you have access to different tools. I'll work with what we have or go to HD and buy new bits, if they're dull.
We have wooden blocks, so I believe we have everything needed to drill holes.
If by chance the masonary drill doesn't work, 'I don't want cracked pots) I'll price the Diamond.Joe, people who make these pots are out for the money..They could care less if someone loses their plants. Ceramics are ornate, and the average person (not plant people) buy these pots for looks..Remember, many people buy plants in spring, then toss them by fall. They want to show off their new, ceramic pots, lol.
Danny, yes, this is something that needs doing outside. But thanks for the reminder, and taking time to type out instructions. I appreciate it.
BTW, you said, "if it's too detailed for anyone," (meaning your instructions) "too bad."
We're you addressing me and if so, were you kidding? Toni
dellis326 (Danny)
12 years agoWasn't aimed towards you Toni, To anyone who already knows what to do or at least thinks they have nothing more to learn.
If what you have doesn't work and you need to buy a bit or cutting tool, look for the carbide ones, They should have a covering of hard grit on them rather than a blade or teeth. They make a cleaner hole.
There are also carbide spade bits which look like a short steel rod with a triangular flat piece of metal on one end that are pretty cheap. For smaller sizes they can make very nice, clean holes, for bigger sizes drill part way through from the bottom so the tip is through and then drill from the inside to complete the hole, you can get a very clean opening this way.
Danny
greentiger87
12 years agoPothos will usually be fine without drainage, as it thrives even when rooted directly in water. Many, many plants can be successfully converted to "hydroculture", which is essentially what happens in a pot with no drainage - but you'll have much better luck with an inorganic media like expanded clay (hydroton) or perlite. Any vining philodendron (like heart-shaped philodendron) will thrive like this, even when the pot is small. You can check the internet for other plants particularly suitable - just try the search terms "hydroculture", "hydroton + houseplants", "aquaculture", etc.
If you decide to try hydroculture, you should start with a very small plant or a small cutting - because the plant will essentially lose its roots and grow new "water roots" with the appropriate structure/components for growing in water. Plants with large root systems have a very hard time supporting lots of foliage with essentially useless "soil" roots.
Both dracaena and jade plant happen to really hate water-logged conditions. Dracaena in particular is really intolerant of this. however, they both can and have been grown in hydroculture - not good starters though.
pirate_girl
12 years agoSorry, but I disagree about a Pothos potted up w/ no drainage holes.
I too grow cups of Pothos cuttings it in water alone, but I think once in mix, Pothos will need the drainage unless one is a very careful waterer, as ultimately the roots will become soggy & kill the plant.
birdsnblooms
12 years agoThanks Danny..I'll see how the bit works with an inexpensive, `1.00 ceramic pot to start, then go from there.
The only containers I'm worried about are bonsai and large ceramics. They were NOT a dollar, lol.Green Tiger..Years ago, before I'd toss a cutting, it'd be rooted in water. 'Some plants.'
Pothos grow in anything. lol. I've got a few in water, in an area too shady for anything else to grow. They've never been fertilized, and water is changed whenever I think about it. (I'm not suggesting doing this.)
Two other Pothos, 'in soil' are in pots w/o drainage. It isn't that I want them to die, but they were extras, rooted, and placed in ceramic pots w/o holes.I've rooted Dracaenas in water, then placed in soil, but don't know if they'd live long term, hydroponically.
Forget Jades in water..they're succulents..They'd turn into mush. lol.Do you grow your plants in water?
Hey Karen..how ya doing? Toni
chilliwin
11 years agoThank you for all these useful questions and answers. I have also one about 21 CM diameter ceramic pot without hole. I am a newbie pot gardener. This wide/length 30 cm and 31 cm height white ceramic pot has no drainage hole. I re-potted my habanero about 5 months. I did not put any thing else at the bottom of the pot such as stone or polystyrene. Once I had problems of falling leaves and flowers probably due to the over watering. This ceramic pot is very thick and I do not like to make a hole instead I would like to manage it somehow.
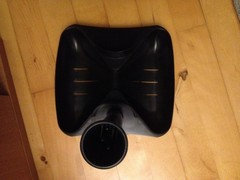
Most of my pots are 17 cm diameter length/wide/height are 23 cm Nectarine Ikea self-watering pots. Two of them are 21 cm diameter length/wide 30 cm and height 31 cm self-watering Nectarine Ikea. Still now I do not have any problems. I do not like to drill this pot,sorry. I will take the advice to us it as a cachepot/put small pot with drainage hole. I am also thinking about to do something like Nectarine Self-watering pot. The best thing is to put the self-watering system of Nectarine inside the ceramic pot I think.

NaturalMystic
10 years agoEven though this post was created a year ago I recently stumbled across it searching for the same answers as the original poster. The solution I personally found to our similar problem was never listed.
First of all I'd to make it clear that I am specifically planting succulent type plants and have no knowledge about the plants this post was originally created for, only that we share the common interest of pots with no draining holes...
My ever so wise mother in law had been recycling water bottles by crushing them and placing them in the bottom of her planters to create drainage the same way rocks would.
Recently we found out packing peanuts were a byproduct of corn and it sort of hit us all at once. Our "theory in testing" is that the packing peanuts will create the drainage we want while storing just enough water for the plants to use when they choose.pirate_girl
10 years agoNaturalM,
If you read up on the latest abt water drainage in containers, you'll learn this theory has been debunked & it's actually now thought to do harm, not good, to use rocks at the bottom of pots. It turns out not to aid drainage at all.
This would likely be even more of a problem for succulents (not less).
fats626
9 years agoMystic, can you please tell me a bit more about your peanuts method? How is it working? Are you placing soil on top of peanuts? Do you use a screen? How is your theory testing out? It sounds like a great solve : )
If anyone has any further ideas, can you please share them with me? I, too, am trying to solve this problem, and really don't want holes as the indoor pots are on my dining room table and are too heavy to lift for watering.
Additionally, how are you watering the potted plants? Are you pouring water? Misting? Please share! thx
HU-221827390
2 years agoI have a beautiful head ceramic hanging planter without holes. It's not too big. Can I put a plastic potted plant into a plastic bag with rocks for drainage into this?

tapla (mid-Michigan, USDA z5b-6a)
2 years agolast modified: 2 years agoYou can, at least temporarily. You will need to monitor the plant's water needs VERY carefully, and using a wooden 'tell' is far more accurate than using a finger or a "water meter", which doesn't reliably measure moisture levels (it measures electrical conductivity). If you manage to get the watering right, your remaining challenge is in the fact that all the salts/ dissolved solids in your tapwater and fertilizer solutions will remain in the soil and soil solution (water in the soil). As they accumulate, the increasing concentration of salts/dissolved solids will make it increasingly difficult for plant cells to absorb water. Ultimately, unless you provide a remedy, the plant will die of thirst even if roots are in a sea of plenty. The technical term is plasmolysis, but the common term is 'fertilizer burn', which can occur from tapwater alone, even if you use no fertilizer, which is an essential part of the care regimen for containerized plants.
Al

Paul MI
2 years agoSome obvious voodoo here with the resurrection of a very old thread. Besides using the holeless pot as a cache pot, one could also look at carnivorous plants. Many grow in bog conditions and therefore would not need drainage.
tapla (mid-Michigan, USDA z5b-6a)
2 years agoHi, @Paul. Plants acclimated to bog conditions have adapted by producing roots different than those of terrestrial plants. At the core of terrestrial plant's root is the cortex, often referred to as pith and comprised of a tissue called parenchyma. Instead of being filled with parenchyma, roots of plants with root systems which have been inundated develop a different type of pith/cortex structure, filled with aerenchymous instead of parenchymous tissue. (Root) cortical aerenchymous tissue allows a diffusive flux of oxygen from above-ground tissues to root tips. This tissue supports the respiratory demand of the root tissues and allows oxygen to leak into the surrounding soil due to the fact it is filled with gas conducting voids and channels so the gasses normally exchanged with air in the rhizosphere (root zone) are exchanged through above ground organs, leaves and stems, through stomata and lenticels respectively, both of which are openings in plants' dermal tissues and which facilitate gas exchange. Aerenchymous tissue in roots usually forms as a genetically programmed part of normal morphology for boggy plants, but for terrestrial plants subject to inundation, it is created through death and dissolution of cells living at the time roots were inundated.
The problem with inundation of terrestrial plants that suffer inundation is, they make the transition back and forth between a well-aerated rhizosphere and one that's inundated poorly. So, while many terrestrial plants can be conditioned to function well with inundated roots, they usually decline quickly and die when asked to transition on say a weekly, bi-weekly, or even monthly basis between well-aerated and inundated.
Al

gardengal48 (PNW Z8/9)
2 years ago"Joe, people who make these pots are out for the money..They could care less if someone loses their plants. Ceramics are ornate, and the average person (not plant people) buy these pots for looks..Remember, many people buy plants in spring, then toss them by fall. They want to show off their new, ceramic pots, lol."
Just though I'd add that ceramic pots without drainage holes were never intended by their manufacturers for direct planting......they were always intended to be cache pots or decorative pots that can hold more functional ones. No one is out to screw you, kill your plants or take your money :-) They are just not being used in the manner intended!
Adam Gilchrist
2 years agoI've done it. It's not ideal, but I guess if you change the soil often, are careful not to overwater...well, it's not perfect, let's just say that. But I have a really old pot from my mom I don't want to damage that has a plant in it.
You can also turn any ceramic pot without a hole into a ceramic pot with a hole using a $9 diamond drill set from any good hardware store or online. You'll get enough drill bits for pots from any size from 3" to 20". Just use them wet or you'll watch them turn red hot in use. Which is kind of fun.tapla (mid-Michigan, USDA z5b-6a)
2 years agolast modified: 2 years agoAbout drilling holes on vitrified (glass/ceramic) pots:
Drilling holes in pots
The 2 types of drill bits most appropriate for drilling holes in pots are a diamond core drill for the highly vitrified (hard material - baked at very high temps - glass, ceramic, ......) pots, and a drill with several names for drilling clay pots fired at low temps, such as terra cotta. That (carbide) drill is called a 3-point drill, spear point drill, or a spade drill, seen here:

For the hard stuff, diamond core drills are best,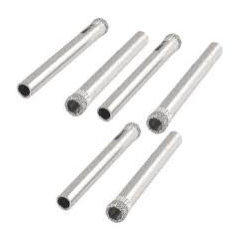
though the 3 point drill will drill the hard stuff, too.You can buy either type at big box stores. They're not that expensive, and they last a long time if you take care of them. Diamond core drills are best used with a steady stream of coolant from a squeeze bottle (contact lens solution bottles work great for this) or with the work surface barely submerged. I.e., put the pot upside down in a tub and fill the tub with water until it just covers the work surface, then drill. If you use a spritzer or squirt bottle, a 50/50 mix of antifreeze and water is an excellent coolant, and soapy water is better than plain water but not as good as the antifreeze mix. The coolant keeps the tool from over-heating, and in doing so, increases the life of the tool substantially - like triple or quadruple the number of holes you can drill.
Regular masonry bits are sorta "ok" for drilling terra cotta (you can make them work), but inappropriate for anything harder. The right tool makes everything easier.
Al

Esther-B, Zone 7a
2 years agoSilk plants don't need a drainage hole. Any other type of plant, I'd drill one if it wasn't there originally. When drilling, you must use a tile drill bit, which is pointed. You should make an "X" of masking tape and drill the hole at the intersection of the 2 pieces of tape. And you must go slowly, making sure to apply water at frequent intervals to the drill bit.
tapla (mid-Michigan, USDA z5b-6a)
2 years agolast modified: 2 years ago"Tile drill" covers a lot of ground as there are many types of tile and many types of drills that are used to drill tile ...... some with poor or middling results, some with good results. Too, using a piece of masking take on the substrate serves absolutely no purpose other than to hinder loss of heat from the substrate and increase the probability of breakage from thermal shock.
The reason I'm sure of myself is because for 30 years I owned and operated a glazing contracting corporation, and one of the things we did every day was hole fabrication in all manner of hard and vitrified materials like glass, porcelain, granite, cement, stainless steel, ferrous and non-ferrous metals .....
"Go slowly" is also vague. The speed with which a hole is drilled in vitrified materials depends on the thickness of the material, hardness of the material, quality of the tool being used, the coolant/lubricant, and the amount of pressure used, which should always be minimal. It's good to remember that you are using a tool to grind through glass, not drilling it as you would drill through metal or wood. Pressing too hard increases the potential for breakage and large areas of spale (chips/flakes) on the opposite side from which the work is done, and it shortens the tool life. The interface between the tool and the substrate must have a steady flow of coolant for best results.
Of all available bit types capable of making holes in vitrified materials, the common and least expensive masonry drill, seen below, is least suited to the job and a poor choice.

At best, these ^^^ are only suited to drilling low-fired clay (terra cotta). If you are forced use this type of bit for clay, try to limit your hole size to no more than 5/16". Coolant isn't absolutely required when using this bit for drilling low-fired clays, but it does extend tool life.Al
Adam Gilchrist
2 years agoI strongly prefer the diamond core drill bits myself. I'm...not so good at keeping them wet, but use them rarely enough that excessive wear isn't an issue & it's kind of fun to see an orange-hot piece of metal...
tapla (mid-Michigan, USDA z5b-6a)
2 years agolast modified: 2 years agoI have no problem with whatever someone's personal preferences are, so I have no desire to change your wont, but I do think it should be made clear to all others there is a price to be paid for allowing any drilling bit to become over-heated, especially to the point they are glowingly hot. The price comes not only in money outlay caused by early and unnecessary tool failure, a much greater probability any vitrified (class/ceramic) pot or other material being drilled will break from thermal shock is also part of the risk.
The production grade core drills we used at the shop cost more than $100 for a half inch bit, so if I caught someone using one dry or for a chore it wasn't intended to be used for, someone would be in for a spontaneous reeducation, because they would already have had an education before being allowed to use the tool. Now that I've considered it further, I can say the price of the tool wouldn't even matter.
Al
Esther-B, Zone 7a
2 years agoThe drill bits I've (quite successfully) used to drill holes in pots that came without them have an arrow-shaped part at the bottom. I apply steady but not excessive pressure and keep the drilling area flooded with water.
tapla (mid-Michigan, USDA z5b-6a)
2 years agoThose would commonly be called spade, 3-point, or spear-tip bits.
Al
Paul MI
2 years agoOh, I'm quite familiar with the fact that bog plants have differences in their roots, Al. :-) I just thought it would be an alternative for the OP to pursue.
Paul MI
2 years ago@Adam Gilchrist: I would have to agree with Al, My concern would not be with regards to the damage to the drill bit per se .... The ones for occasional use are cheap. Rather, it is the safety issue. Under such conditions as you describe, it is very easy for the ceramic or glass to break or shatter and you getting injured. Not worth the risk. Keeping it wet is not necessarily difficult. I have done a few small pots. I sat the pot-to-be in a bowl of cold water and put a little water in the bowl as well. As I drilled, I would stop every so often to dump out the "muddy" warm water and add some cool water back into the pot.
tapla (mid-Michigan, USDA z5b-6a)
2 years agoFor core drills only ..... try this:
Turn your pot over so you can drill from the bottom.
Set the pot in a tub, deeper than the pot is tall.
Fill with water so the water just barely covers the work surface (very bottom of the pot).
Add a good measure of dishsoap/detergent to the water and mix slightly.
Start drilling (grinding) the hole. Since the interface between tool and object being drilled will be under water, there is no need to worry about trying to cool/lubricate with one hand while drilling with the other.
Tips:
Core drills will tend to wander if you start with the bit perpendicular to the work surface. To correct, mark center and start the hole slightly off center (1/2 the bit's diameter) to compensate for the following tip: Hold the bit at an angle to the work surface when you start the hole This will grind a crescent-shaped mark in the bottom that will tend to hold the bit in place as you slowly raise the drill so it's 90* to the work surface to complete the hole.
If you have any putty around the house, you can build a small dam around the hole location. The dam walls should be maybe 1/2" tall and the dam only needs to be a little larger than the hole you'll drill. After the dam is in place, fill with water and drill. If you use this method, start your hole by holding the bit at an angle before the dam is built.
This is the tool we use when drilling glass/mirror.
It won't work on pots, but the dam I described will.

Al
tapla (mid-Michigan, USDA z5b-6a)
2 years agoSometimes we choose not to answer questions for no reason other than the manner or spirit in which they were asked.
Al


birdsnblooms