


Making silicone molds...
Buddyfly
20 years ago
Related Stories
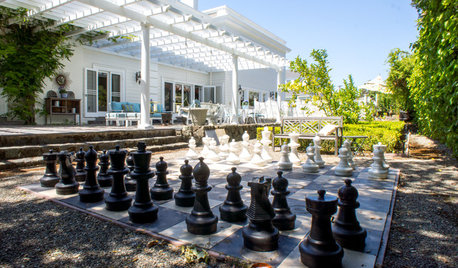
INSPIRING GARDENSChickens, Chess and Swimming Star in a Silicon Valley Yard
Some fowl play is afoot in these outdoor rooms, but the family members and their many guests have a pretty good time too
Full Story
REMODELING GUIDESDesign Details: Moldings — or Not?
16 new and unusual ways to trim your doors, floors and ceilings
Full Story
DECORATING GUIDESArchitectural Details Make All the Difference
Are you missing an opportunity to enhance your home with brackets, cabinet feet and moldings?
Full Story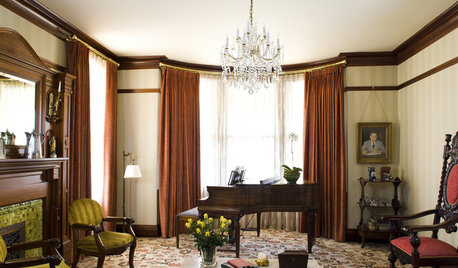
GREAT HOME PROJECTSHow to Bring Out Your Home’s Character With Trim
New project for a new year: Add moldings and baseboards to enhance architectural style and create visual interest
Full Story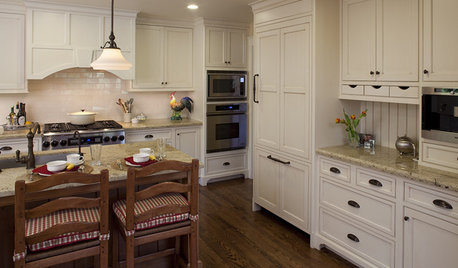
KITCHEN DESIGN9 Molding Types to Raise the Bar on Your Kitchen Cabinetry
Customize your kitchen cabinets the affordable way with crown, edge or other kinds of molding
Full Story
REMODELING GUIDESCrown Molding: Is It Right for Your Home?
See how to find the right trim for the height of your ceilings and style of your room
Full Story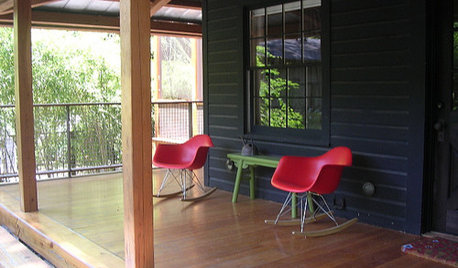

DECORATING GUIDESWall Art for Traditional Living Rooms Can Fit or Break the Mold
Tips on How to Pick a Piece That You Love, From Paintings to Mirrors, Classic to Contemporary
Full Story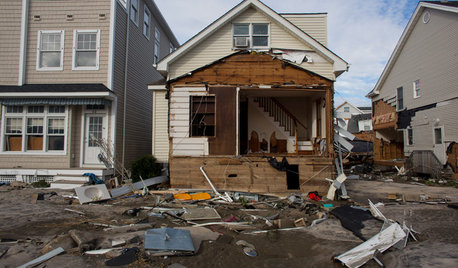
DISASTER PREP & RECOVERYHow to Combat Mold in a Flooded House
Before you rebuild or restore your water-damaged home, take these steps to keep mold at bay
Full Story
Dena6355
lazydaisy
Related Professionals
Carlisle Landscape Architects & Landscape Designers · Baltimore Landscape Architects & Landscape Designers · Middle Island Landscape Architects & Landscape Designers · Simi Valley Landscape Architects & Landscape Designers · Canton Landscape Contractors · Anderson Landscape Contractors · Wakefield Landscape Contractors · Barrington Landscape Contractors · Battle Ground Landscape Contractors · Nutley Landscape Contractors · Rockwall Landscape Contractors · Soddy Daisy Landscape Contractors · Wallingford Landscape Contractors · Westchester Landscape Contractors · Bensenville Landscape Contractorslazydaisy
lazydaisy
BuddyflyOriginal Author
leigh_wi
BuddyflyOriginal Author
leigh_wi
BuddyflyOriginal Author
Dena6355
leigh_wi
Dena6355
leigh_wi
BuddyflyOriginal Author
leigh_wi
BuddyflyOriginal Author
hebbie70
leigh_wi
BuddyflyOriginal Author
peakpoet
BuddyflyOriginal Author
whiteroses0025
peakpoet
KimmyStar
lonowl
butterflybush
BuddyflyOriginal Author
butterflybush
butterflybush
BuddyflyOriginal Author
grasshoppersilks
butterflybush
Jilly_W
butterflybush
dixiesmom
daisy_ny6
iluvstones
peakpoet
julep
BuddyflyOriginal Author
gomanngo
mudmaker
BuddyflyOriginal Author
Sarahsaid
QsilvQ
dixiesmom
HowieDoin
Fleur
ontariogal
sherida_2009