


Progress of a mould from start to finish
Running_Dog
18 years ago
Sort by:Oldest
Comments (69)
Related Stories
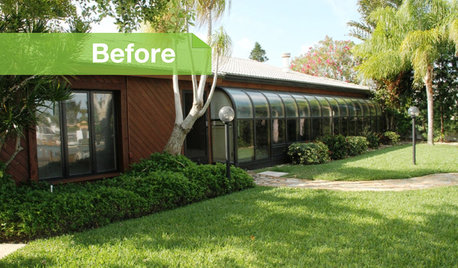
REMODELING GUIDESFollow a Ranch House Renovation From Start to Finish
Renovation Diary, Part 1: Join us on a home project in Florida for lessons for your own remodel — starting with finding the right house
Full Story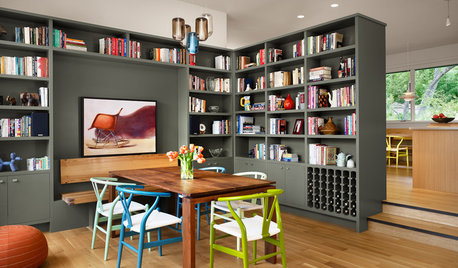
HOUZZ TOURSHouzz Tour: A Texas Home Gets a Healthy, Fresh Start
Mold eradication was just the beginning for this Austin family's home on a creek bed — toxins of all kinds now don't make it past the door
Full Story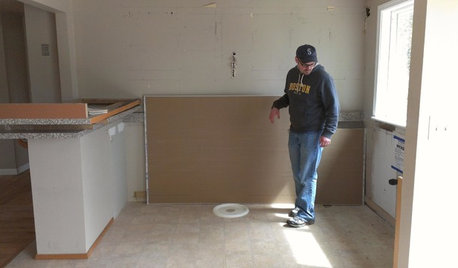
KITCHEN DESIGNStylish New Kitchen, Shoestring Budget: See the Process Start to Finish
For less than $13,000 total — and in 34 days — a hardworking family builds a kitchen to be proud of
Full Story
COLOR PALETTESCrisp, Clean White Interiors to Start the New Year Right
Beginning with a blank-slate backdrop gives you infinite design freedom with accent colors, furniture styles and finishes
Full Story
REMODELING GUIDESHow to Size Interior Trim for a Finished Look
There's an art to striking an appealing balance of sizes for baseboards, crown moldings and other millwork. An architect shares his secrets
Full Story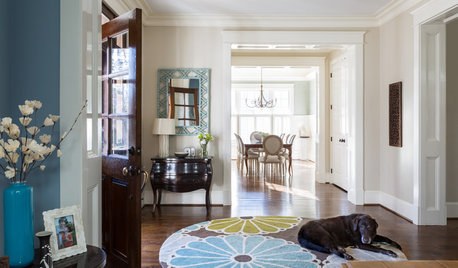
TRADITIONAL HOMESHouzz Tour: Family Gets a Fresh Start in a Happy New Home
Decorating her house from scratch spurs a big career change for this designer
Full Story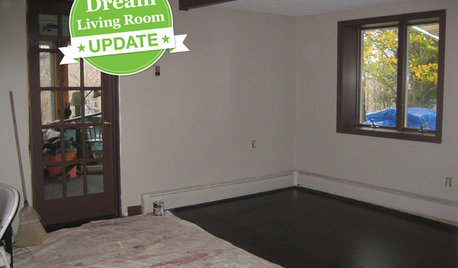
DECORATING GUIDESDream Living Room Makeover Progress Report
See how our sweepstakes winner is handling life in a construction zone — and get a peek at the remodel's progress
Full Story
DESIGN PRACTICEDesign Practice: Start-up Costs for Architects and Designers
How much cash does it take to open a design company? When you use free tools and services, it’s less than you might think
Full Story
ARCHITECTUREDesign Practice: How to Start Your Architecture Business
Pro to pro: Get your architecture or design practice out of your daydreams and into reality with these initial moves
Full Story
HOUZZ TOURSHouzz Tour: New Love and a Fresh Start in a Midcentury Ranch House
A Nashville couple, both interior designers, fall for a neglected 1960 home. Their renovation story has a happy ending
Full StorySponsored
shrubs_n_bulbs
Running_DogOriginal Author
Related Professionals
Comstock Park Landscape Architects & Landscape Designers · Folsom Landscape Architects & Landscape Designers · Aurora Landscape Contractors · Springfield Landscape Contractors · Berwyn Landscape Contractors · Cary Landscape Contractors · Dedham Landscape Contractors · Forest Hills Landscape Contractors · Fort Worth Landscape Contractors · Melrose Landscape Contractors · Munster Landscape Contractors · North Potomac Landscape Contractors · Riverview Landscape Contractors · West Allis Landscape Contractors · Maplewood Landscape ContractorsRunning_DogOriginal Author
rockyn
Running_DogOriginal Author
sereneseen
Running_DogOriginal Author
Running_DogOriginal Author
ltd123
shrubs_n_bulbs
MuddyMesaWoman
Running_DogOriginal Author
rockyn
Running_DogOriginal Author
Running_DogOriginal Author
Running_DogOriginal Author
shrubs_n_bulbs
Running_DogOriginal Author
paws4pets
rustinj
Running_DogOriginal Author
shrubs_n_bulbs
Running_DogOriginal Author
JerryatTreeZoo
Running_DogOriginal Author
Sarahsaid
rockyn
Running_DogOriginal Author
Sarahsaid
straw_dog
Running_DogOriginal Author
tango88
DebZone8
DebZone8
summerdaze_tn
Running_DogOriginal Author
MuddyMesaWoman
Running_DogOriginal Author
DebZone8
daybees
Running_DogOriginal Author
Running_DogOriginal Author
DebZone8
Blooming_Stone
Running_DogOriginal Author
lazydaisy
aloyzius
ladycraft
dchall_san_antonio
Running_DogOriginal Author