


Windspinners Part Deux
wackyweeder
17 years ago
Related Stories
TASTEMAKERSCatching Up With the Queen of Shabby Chic
Rachel Ashwell defined a style embraced by countless fans over the past 25 years. Find out what she’s turning her sights to now
Full Story
KITCHEN DESIGNUsing White Marble: Hot Debate Over a Classic Beauty
Do you love perfection or patina? Here's how to see if marble's right for you
Full Story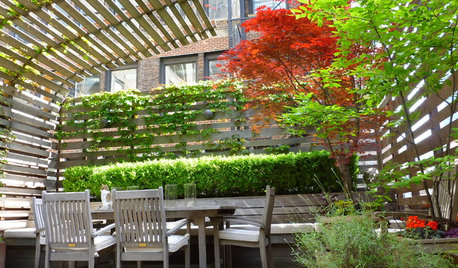
GARDENING AND LANDSCAPINGHouzz Call: Show Us Your Great Patio, Deck or Rooftop!
Give your patio a chance at the spotlight as we head outdoors for a new summer ideabook series
Full Story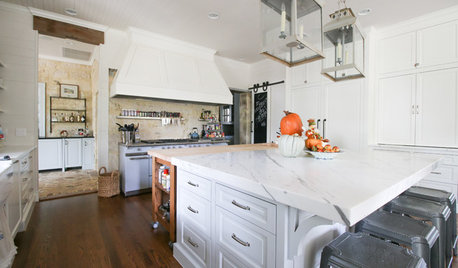
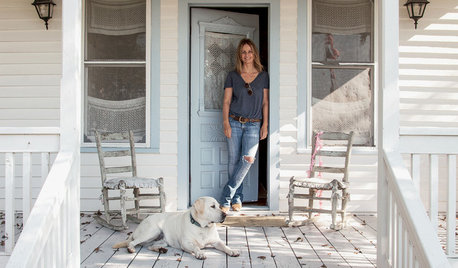
MY HOUZZMy Houzz: Historic Textures Meet Modern Touches in Texas Hill Country
An oft-renovated former log cabin now features a soothing palette and nods to New Orleans
Full Story
FURNITUREHolding Out for Quality
Cheap furniture has its place, but more shoppers are waiting to invest for the long haul
Full Story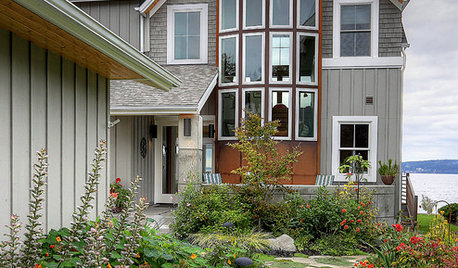
CONTEMPORARY HOMESHouzz Tour: Coastal New England Style Meets Pacific Northwest Modern
Homeowners ease into retirement in this Camano Island home, enjoying seaside views, cooking and gardening
Full Story
ECLECTIC HOMESHouzz Tour: Playful Style Reinvents a Childhood Home
You really can go home again, especially when you redecorate with classic, modern and quirky pieces that suit your style
Full Story
FURNITUREArmoires Travel From Ancient Rome to High-Style Storage
Go ahead, be possessive — this beautiful furniture piece with a rich history gives your treasures a proper home
Full StorySponsored
Your Custom Bath Designers & Remodelers in Columbus I 10X Best Houzz
More Discussions
nmgirl
wackyweederOriginal Author
Related Professionals
Beachwood Landscape Architects & Landscape Designers · Kyle Landscape Architects & Landscape Designers · Marco Island Landscape Architects & Landscape Designers · Arlington Landscape Contractors · Elgin Landscape Contractors · Hartford Landscape Contractors · Wakefield Landscape Contractors · Downey Landscape Contractors · Fort Myers Landscape Contractors · Gloucester Landscape Contractors · Morrisville Landscape Contractors · Quincy Landscape Contractors · Waterford Landscape Contractors · Norridge Landscape Contractors · Bensenville Landscape Contractorsjlily
Bright199
barefootin
proudmary56
wackyweederOriginal Author
TwoMonths
wackyweederOriginal Author
proudmary56
TwoMonths
proudmary56
nonacook
Adella Bedella
kudzukween