


Backs of my plate flowers
concretenprimroses
15 years ago
Related Stories
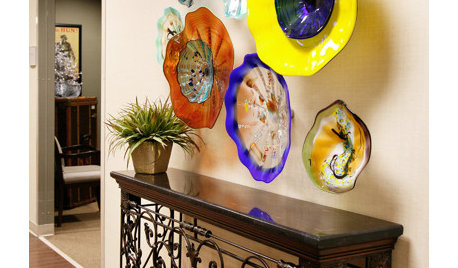
ARTWall Candy: Dish Up Colorful Glass Art Plates
These gorgeous handblown plates may look good enough to eat, but they're better off admired on the walls
Full Story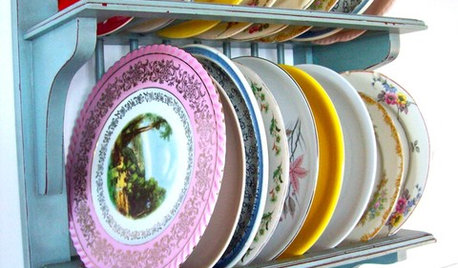
ENTERTAININGMix Your Plates for Memorable Table Settings
Hodgepodges are happenin’ — learn how to combine different-style dishes, silverware and glassware for a highly personal look
Full Story
GARDENING GUIDESLet Lilac Love Flower This Spring
Whatever you bestow or receive for Mother's Day, lilacs can be an unmatched gift in the garden in May
Full Story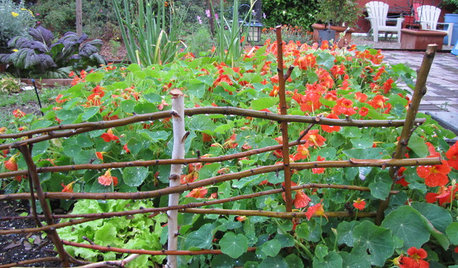
GARDENING AND LANDSCAPINGEdible Flowers Offer a Sweet Taste from the Garden
Flowers that beautify the landscape can also pretty up the plate or sweeten a spread
Full Story
DECORATING GUIDESBaseball Decor Steps Up to the Plate
Now batting: baseball-theme murals, a rug that mimics turf and a busload of sports memorabilia, just in time for opening day
Full Story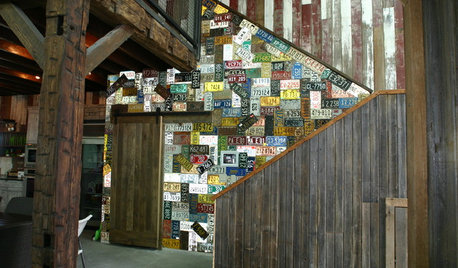
DECORATING GUIDESGive License Plates the Green Light
Imagination is the driving force behind these car and motorcycle plates repurposed as artistic home decor
Full Story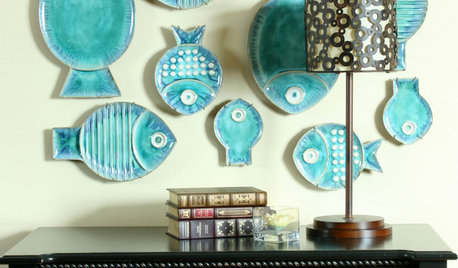
DECORATING GUIDESEasy Decorating: Great Plate Arrangements
How to Get Your Pretty Plates Out of Hiding and On Display
Full Story
KITCHEN DESIGNTraditional Revisited: Plate Racks
This Traditional Way to Keep Plates Handy Works in Contemporary Homes Too
Full StorySHOP HOUZZShop Houzz: Fashion Plates
Spruce up your dinner table — or the walls — with these artful plates
Full Story
PRODUCT PICKSGuest Picks: Pretty Plates for Walls and Tables
Decorate with them or eat off ’em. Plates as gorgeous as these will serve up style no matter how you use them
Full StoryMore Discussions
concretenprimrosesOriginal Author
Marlene Kindred
Related Professionals
Reading Landscape Architects & Landscape Designers · Edmond Landscape Architects & Landscape Designers · Surprise Landscape Architects & Landscape Designers · Bellflower Landscape Architects & Landscape Designers · East Rancho Dominguez Landscape Architects & Landscape Designers · Owings Mills Landscape Architects & Landscape Designers · Salisbury Landscape Architects & Landscape Designers · Ellensburg Landscape Contractors · Essex Landscape Contractors · Inglewood Landscape Contractors · Merced Landscape Contractors · Placerville Landscape Contractors · Plymouth Landscape Contractors · Woodburn Landscape Contractors · Reisterstown Landscape ContractorsconcretenprimrosesOriginal Author
countrygrl
luna_llena_feliz
Marlene Kindred
concretenprimrosesOriginal Author
Marlene Kindred
laurastheme