


club cadet rzt transmission belt replacement...help!
knot2worry
14 years ago
Featured Answer
Comments (9)

cadronboy
12 years agolast modified: 9 years agorustyj14
12 years agolast modified: 9 years agoRelated Professionals
Parole Landscape Architects & Landscape Designers · Blue Springs Landscape Contractors · Bowie Landscape Contractors · Eustis Landscape Contractors · Gaithersburg Landscape Contractors · Middle River Landscape Contractors · River Ridge Landscape Contractors · Rochester Landscape Contractors · Whittier Landscape Contractors · Wilsonville Landscape Contractors · Sun Valley Landscape Contractors · Del Aire Carpenters · Kissimmee Carpenters · Olathe Carpenters · St. Johns Carpenterstomplum
12 years agolast modified: 9 years agohippy
9 years agolast modified: 9 years agoRawnsNeed
9 years agolast modified: 9 years agoraymead
8 years ago
Cody Manley
7 years ago- PRO
Cutting Edge Contract Flooring Ltd.
3 years agolast modified: 3 years ago
Related Stories
FUN HOUZZ14 Things You Need to Start Doing Now for Your Spouse’s Sake
You have no idea how annoying your habits at home can be. We’re here to tell you
Full Story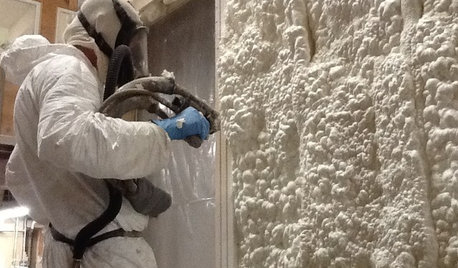
MATERIALSInsulation Basics: What to Know About Spray Foam
Learn what exactly spray foam is, the pros and cons of using it and why you shouldn’t mess around with installation
Full Story
MOST POPULARThe Polite House: On ‘No Shoes’ Rules and Breaking Up With Contractors
Emily Post’s great-great-granddaughter gives us advice on no-shoes policies and how to graciously decline a contractor’s bid
Full Story
someguyII