


Frustrated finding large organic container dirt recipe
jmcglaug
13 years ago
Sort by:Oldest
Comments (21)
Related Stories
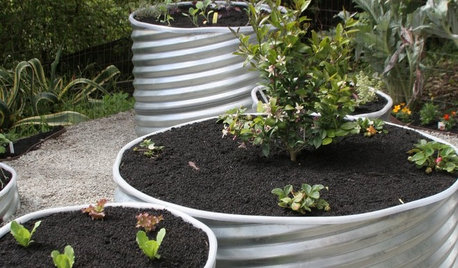
CONTAINER GARDENSContainer Gardening Basics: The Dirt on Soil
Learn the types of potting soil available and the best mixes to help your containers thrive
Full Story
FARM YOUR YARDHow to Grow Vegetables in Containers
Get glorious vegetables and fruits on your patio with a pro’s guidance — including his personal recipe for potting mix
Full Story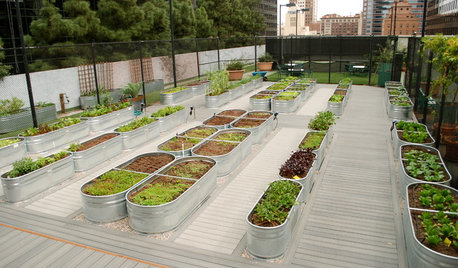
LANDSCAPE DESIGNRecipe for Modernist Edible Garden Style
Herbs, vegetables and fruit trees aren’t just for traditional gardens. Here’s how to design them into modernist landscapes
Full Story
KITCHEN DESIGNKitchen Recipes: Secret Ingredients of 5 One-of-a-Kind Cooking Spaces
Learn what went into these cooks’ kitchens — and what comes out of them
Full Story
KITCHEN DESIGNSweet Ideas and a Truffle Recipe from a Chocolatier's Test Kitchen
A $2,100 budget didn't mean a half-baked kitchen redo; this confectioner just rolled up her sleeves and rolled out the improvements
Full Story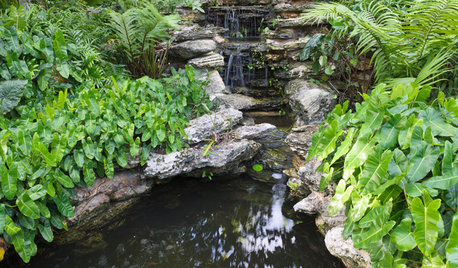
LANDSCAPE DESIGNRecipe for Tropical Edible Garden Style
Appeal to exotic good taste with fruit trees, palms and tropical look-alikes in your temperate-climate garden
Full Story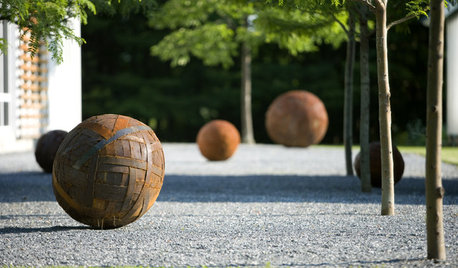
LANDSCAPE DESIGNWhat Kind of Gardener Are You? Find Your Archetype
Pick from our descriptions to create a garden that matches your personality and tells your story
Full Story
PRODUCT PICKSGuest Picks: Handy Finds for Painting Projects of All Kinds
Make over rooms and furniture more easily and with better results with the right paint and gear
Full Story
BUDGET DECORATINGBudget Decorator: 12 Vintage Finds to Take Home This Spring
Experience the thrill of the hunt and the triumph of a bargain when you set out on a thrifting jaunt with these finds in mind
Full Story
CONTAINER GARDENS7 Deer-Resistant Flowers for Your Summer Containers
Grow these as protection for edibles or just for their colorful beauty — deer might not like them, but everyone else will
Full Story
gardengal48 (PNW Z8/9)
jmcglaugOriginal Author
Related Professionals
Beachwood Landscape Architects & Landscape Designers · Washington Landscape Architects & Landscape Designers · Brookside Landscape Contractors · Fort Myers Landscape Contractors · Hoffman Estates Landscape Contractors · Lake Saint Louis Landscape Contractors · Morrisville Landscape Contractors · New Berlin Landscape Contractors · Rosemount Landscape Contractors · Spring Landscape Contractors · Vadnais Heights Landscape Contractors · Asheville Decks, Patios & Outdoor Enclosures · Des Moines Decks, Patios & Outdoor Enclosures · Lafayette Decks, Patios & Outdoor Enclosures · Saint Louis Park Decks, Patios & Outdoor EnclosuresjmcglaugOriginal Author
gardengal48 (PNW Z8/9)
tapla (mid-Michigan, USDA z5b-6a)
jmcglaugOriginal Author
tapla (mid-Michigan, USDA z5b-6a)
jmcglaugOriginal Author
jmcglaugOriginal Author
tapla (mid-Michigan, USDA z5b-6a)
jolj
jmcglaugOriginal Author
coachgrumpy
tapla (mid-Michigan, USDA z5b-6a)
jmcglaugOriginal Author
tapla (mid-Michigan, USDA z5b-6a)
jmcglaugOriginal Author
tapla (mid-Michigan, USDA z5b-6a)
jolj
jmcglaugOriginal Author
Dan _Staley (5b Sunset 2B AHS 7)