My name is Dan Martin, I'm a long time reader, first time poster. After about a year of research and watching everyone else build their clay bottom swimming ponds, I finally decided to start mine this year. As soon as summer hit and the earth dried out enough to run the track loader, I:
1. Removed all deciduous trees within a 50ft radius of pond edge (assiduous trees like pines were left in place... appx 10ft from water edge).
2. Marked out the area where the declination grade will begin.
3. Removed and piled up the topsoil (which will later be added to the berm to control erosion).
4. Removed a layer of sand (about a foot) and piled it up around the edges (which will later be brought back into the pond as a bottom over the carpet).
5. Removed a layer of sandyloam (about another foot).
6. Removed a layer of almost pure clay (about 90% clay, 9% sand, 1% silt) and piled it in the middle of the pond (which will later be drawn up around all of the edge for final waterproofing of the pond).
7. Trenched out an 8in wide channel out the side of the pond, starting from the deepest point (which I'll later install a 4in x 60ft thinwall pipe). This will serve two purposes:
a. Serve as a drain line if/when I need to drain the pond (plan on enlarging it multiple times in the future so as not to invest so much into the project at once).
b. Serve as a sand wash by bringing down only a few inches of sand at a time, and letting the rain wash the silt out little by little. I've found that after removing the topsoil from a large patch of sand, the brownish/tan with black streaks sand turns into an almost white sand after a few rains.
I wanted to post the project here though to get anyone's feedback on the current progress as well as advice on my future steps since it would be too late passing this point for to chance either. My next step (I had planned) is to:
1. Install the 4in drain line (with a cleanout Tee at the bottom) and a threaded adpt and cap on the end.
2. Fill in the channel around the 4in pipe with clay and cover with topsoil.
3. Water proof the bottom and all sides up to 10in below ground level (which would be my appx water level -1-2in) with 4-6in of clay, as well as construct the berm around the lowest half of the pond.
4. Dig out a shallow 4in channel through top and backside of berm for water level drain line.
5. Install water level 4in thinwall drain line through berm and down backside via a 45⁰ elbow (to prevent erosion).
6. Place carpet inside the pond covering clay and extending out about 6in-1ft at ground level on all sides.
7. Install pvc hayward maindrain/grate and 1.5in aquapex from ground level on north side of pond to deepest point in pond (which will be connected to a 1/2hp pump, filter and waterfall).
8. Install 3gal bucket/lid at lowest point in pond, at least 3ft from main drain.
9. Build and install (2) 2cu/ft micro bubbler/diffuser socks and 1/2 125psi poly pipe from ground level on north side of pond to 3 gal bucket (which will be connected to a 1/4hp air pump).
10. Cover carpet, main drain, aquapex and 1/2 poly pipe with 10in of sand in 3in increments (to wash out sand).
11. Build block retaining wall 2ft deep and 10ft out from west and north edges of pond (1/3 of surface area), 1/2in below water level.
12. Install threaded adpt on end of 4in pipe and 4in threaded cap.
13. Cover berm with 3-4in topsoil and place 1.5in - 3in rock on backside of berm around water level drain line to prevent erosion.
14. Install and connect water pump, filter and air pump (model #'s on any continues duty cycle 1/6-1/4hp air pumps?).
15. Once full, build and place solar powered floating surface skimmer/ground agitator in pond. For this I wanted to use a moving sandy bottom vacuum hose and attachment connected to the suction side of a floating solar skimmer like the Solar Breeze Robotic Pond Skimmer (http://www.youtube.com/watch?v=goMSVC25zOo). In this configuration, a shopvac water attachment (http://cdn.mscdirect.com/global/images/ProductImages/0857190-11.jpg) would be dragged along the bottom behind the skimmer as it moves along the top via an 1.25in x 10ft vacuum hose, sucking debris off the surface of the sand similar to a fish tank gravel vacuum. (http://www.youtube.com/watch?v=GdBkiZ2DdxM). The problem with this idea was that it 1) it would suck up too much sand in the process; and 2) I'd lose the skimmer element of the machine. My next thought was connect the hose and vacuum attachment (or lightweight rake like tool) to the exhaust side of the skimmer. In this manner the machine would blow pressurized water out and down the hose across the surface of the sand, thereby agitating the debris, causing it to cloud up in the pond. Eventually, because of the downhill current caused by the main drain suction, debris would be sucked in and out to the filter or circulated through the living filter. At least that's the theory.
16. Plant living filter plants (preferably of edible variety).
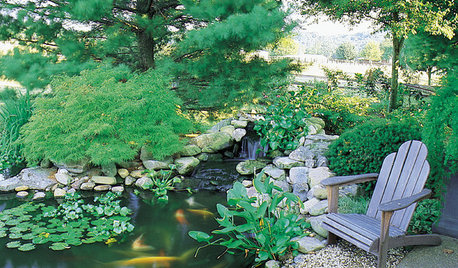
Additional info: The pond is located in Deep East Texas in a sub tropical zone, measures about 30ft east to west x 60ft north to south x 6ft deep on the deep end (4ft below ground level and 2ft above ground level) with an inclination 12:1 on the north, west and east sides, with a steep bermed drop off on the Southside of about 2:1. No chemical additives, direct rain water fill. No fish (at least not at first). No run-off fill. No neighbor run-off.
If I'm missing anything, let me know.
Here's some pics so far:
https://www.facebook.com/dan.martin.author/media_set?set=a.668058683282534.1073741829.100002352246214&type=3


steiconi
dbobul
Related Professionals
West Milford Landscape Architects & Landscape Designers · Wrentham Landscape Architects & Landscape Designers · Harrison Landscape Architects & Landscape Designers · Lyons Landscape Architects & Landscape Designers · Allentown Landscape Contractors · Waterbury Landscape Contractors · Cary Landscape Contractors · Firestone Landscape Contractors · Goodlettsville Landscape Contractors · Lakeville Landscape Contractors · Lantana Landscape Contractors · New Providence Landscape Contractors · Salmon Creek Landscape Contractors · Seminole Landscape Contractors · Clearfield Landscape Contractorsdiysufficient.comOriginal Author
lindsaybev
diysufficient.comOriginal Author
diysufficient.comOriginal Author
waterbug_guy
coconut_palm
diysufficient.comOriginal Author
diysufficient.comOriginal Author