


Landscaping!
yardkat
19 years ago
Related Stories
WORKING WITH PROSWhat Do Landscape Architects Do?
There are many misconceptions about what landscape architects do. Learn what they bring to a project
Full Story
GARDENING AND LANDSCAPINGHouzz Survey: See What Homeowners Are Doing With Their Landscapes Now
Homeowners are busy putting in low-maintenance landscapes designed for outdoor living, according to the 2015 Houzz landscaping survey
Full Story
GREAT HOME PROJECTSLight Your Landscape for Drama and Function
New project for a new year: Install outdoor lighting to highlight special features and keep nighttime walks safe
Full Story
GARDENING AND LANDSCAPINGHow to Work With a Landscape Pro
Lush lawns and gardens don't create themselves. Here's how to work with a landscaping professional for a smooth process and pleasing results
Full Story
LANDSCAPE DESIGN5 Reasons to Consider a Landscape Design-Build Firm for Your Project
Hiring one company to do both design and construction can simplify the process. Here are pros and cons for deciding if it's right for you
Full Story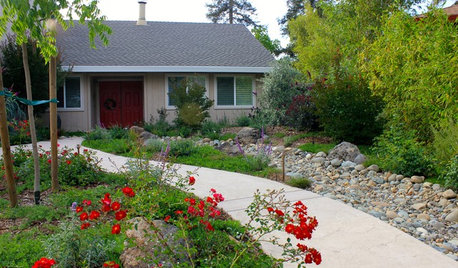
LANDSCAPE DESIGNCalifornia Says Goodbye to the Sprawling Ornamental Lawn
New state rules will effectively limit turfgrass to 25 percent of the landscape in most new and renovated yards
Full Story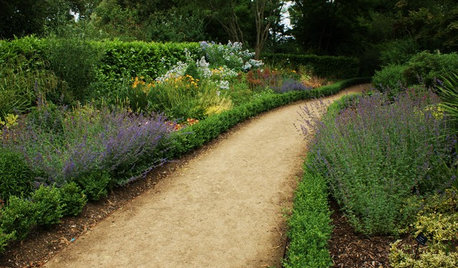
LANDSCAPE DESIGN5 Gravel and Stone Types for a Rockin' Landscape
Give your garden design some textural bam with pebbles, granite, river rocks and other permeable materials
Full Story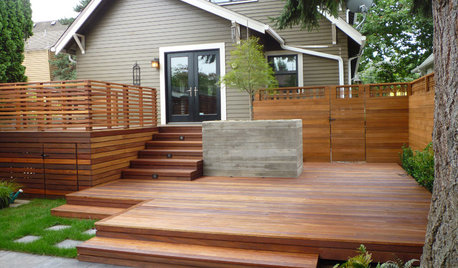
GARDENING AND LANDSCAPINGThat Gap Under the Deck: Hide It or Use It!
6 ways to transform a landscape eyesore into a landscape feature
Full StoryTREESHow to Protect Your Trees When You’re Remodeling or Building
Will your home be undergoing construction this year? Be sure to safeguard your landscape’s valuable trees
Full Story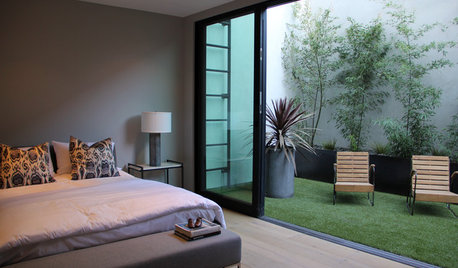
LANDSCAPE DESIGNIs It Time to Consider Fake Grass?
With more realistic-looking options than ever, synthetic turf can be a boon. Find the benefits and an installation how-to here
Full Story
wavesmom
colleen_mi
Related Professionals
West Milford Landscape Architects & Landscape Designers · Lake Oswego Landscape Architects & Landscape Designers · Indio Landscape Contractors · Las Vegas Landscape Contractors · Nanuet Landscape Contractors · Pikesville Landscape Contractors · Pomona Landscape Contractors · Welby Decks, Patios & Outdoor Enclosures · Batavia Decks, Patios & Outdoor Enclosures · Estero Decks, Patios & Outdoor Enclosures · Fort Mill Decks, Patios & Outdoor Enclosures · Portage Decks, Patios & Outdoor Enclosures · Salt Lake City Decks, Patios & Outdoor Enclosures · San Antonio Decks, Patios & Outdoor Enclosures · St. Louis Decks, Patios & Outdoor EnclosuresyardkatOriginal Author
gardenymph
yardkatOriginal Author
yardkatOriginal Author
yardkatOriginal Author
Bostonian
yardkatOriginal Author
shrubs_n_bulbs
atomicdad
yardkatOriginal Author
wavesmom
yardkatOriginal Author
yardkatOriginal Author
alcina
Monte
yardkatOriginal Author
gardenymph
yardkatOriginal Author
gardenymph
hoovb zone 9 sunset 23
Aaron__IN
Jen26
User
colleen_mi
yardkatOriginal Author
gardenymph
carriein
yardkatOriginal Author
bastone
yardkatOriginal Author
gardengardengardenga
mrsbee
chatterbox
phyl345