


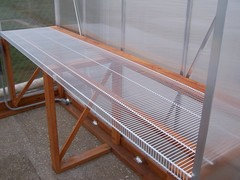
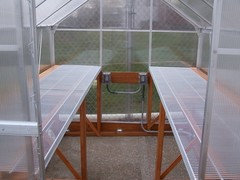
Improving your 6x8 HFGH
dewey1945
11 years ago

Featured Answer
Sort by:Oldest
Comments (25)

japus
11 years agomudhouse_gw
11 years agoRelated Professionals
New Bedford Landscape Architects & Landscape Designers · Hyattsville Landscape Architects & Landscape Designers · Port Royal Landscape Architects & Landscape Designers · Biloxi Landscape Contractors · Byram Landscape Contractors · Fort Mill Landscape Contractors · Hickory Hills Landscape Contractors · Metairie Landscape Contractors · Oak Harbor Landscape Contractors · Point Pleasant Landscape Contractors · Ringwood Landscape Contractors · Elizabeth Solar Energy Systems · Gardena Solar Energy Systems · Holliston Solar Energy Systems · Moreno Valley Solar Energy Systemsdewey1945
11 years agomudhouse_gw
11 years agosteve_in_los_osos
11 years agodewey1945
11 years agomswillis5
11 years agocindy_ga
11 years agosaturn3600
11 years agomudhouse_gw
11 years agomudhouse_gw
11 years agoeastpenna
11 years agodewey1945
11 years agohartford
11 years agodewey1945
11 years agohartford
11 years agodewey1945
11 years agohartford
11 years agodewey1945
11 years agoeastpenna
11 years agodewey1945
11 years agoeastpenna
11 years agodewey1945
11 years agoeastpenna
11 years ago
Related Stories

CRAFTSDIY Project: Home Improvement Store Pop Art
Turn Drywall Mud and Paint Into a Minimalist Conversation Piece
Full Story
HOUSEKEEPING5 Steps to Improve Your Heating System Now
Increase your heater's efficiency and safety for lower energy bills and greater peace of mind this winter
Full Story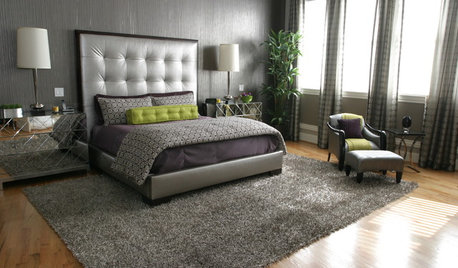
LIFEImprove Your Love Life With a Romance-Ready Bedroom
Frank talk alert: Intimacy and your bedroom setup go hand in hand, says a clinical sexologist. Here's her advice for an alluring design
Full Story

DECORATING GUIDESImprove Your Style Fortune With Lucky Bamboo
Serve this versatile plant straight up or with a twist for auspicious living decor that thrives without soil
Full Story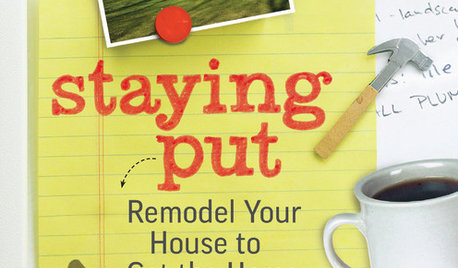
REMODELING GUIDESStaying Put: How to Improve the Home You Have
New book by architect Duo Dickinson shows how to remodel your house to get the home you want
Full Story
DECORATING GUIDES5 Ways Art Can Improve Your Room Design
Artwork can bring together the elements of a room by being a focal point, a color inspiration, a harmonizer and more
Full Story
DESIGN FOR GOODShelter in a Storm: Architects Improve Global Disaster Relief
Temporary housing takes a well-designed turn with affordable, easily stored structures that address privacy
Full Story
GARDENING AND LANDSCAPINGWant More Party Space? 5 Tips to Improve Indoor-Outdoor Flow
Expand your home's entertaining area without adding on by boosting connections between inside and out
Full Story
HOME OFFICESWork Smarter: 8 Ways to Boost Focus in a Home Office
Household distractions may be diverting your mental energy. Turn off the TV and tune in to these ideas for improving attention
Full StoryMore Discussions

hartford