


High Tunnels Finished
jrslick (North Central Kansas, Zone 5B)
15 years ago
Sort by:Oldest
Comments (6)
Related Stories
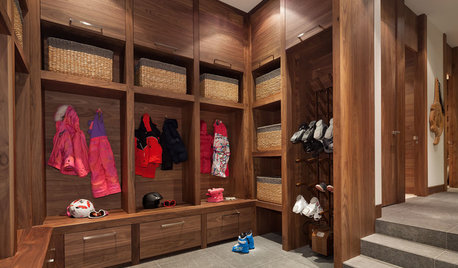
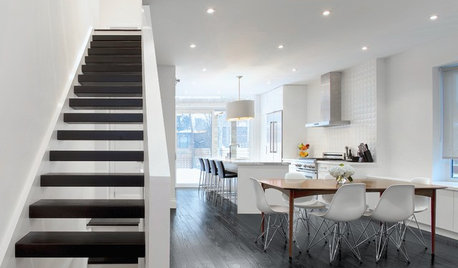
MUDROOMS4 High-Performing Mudroom Ideas
Looking for entryway ideas with plenty of storage? Here’s how to make hooks, cubbies and drawers look great
Full Story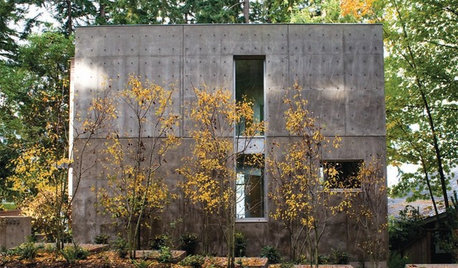
REMODELING GUIDESMaterial Choices: High Marks for Reinforced Concrete
Try poured-in-place construction for a wonderfully tactile, industrial look
Full Story
DECORATING GUIDESGet the High Style of Ebony Minus the High Price
Bring the elegance of a prized wood to your rooms with techniques that replicate the look for less
Full Story
HOUZZ TOURSMy Houzz: Light and Bright in an Amsterdam High-Rise
Crisp white fabrics and finishes plus lots of natural light equals a modern Netherlands apartment with no room for the blues
Full Story
WALL TREATMENTSPick the Right Paint Finish to Fit Your Style
The question of finish may be as crucial as color. See which of these 9 varieties suits your space — and budget
Full Story
BUDGET DECORATING8 Cost-Effective Ways to Get a High-End Look
Don’t discount that expensive material yet. By using a small amount in a strategic way, you can get a luxurious look without the expense
Full Story
CONTEMPORARY HOMESHouzz Tour: Manhattan Penthouse Is High on Style
Blackened steel, glass, teak and a color-shifting staircase make this home a contemporary feast for the eyes
Full Story
SHOP HOUZZShop Houzz: Mix Midcentury Modern Style With High Gloss
Pair midcentury designs with shiny accents for a cohesive and stylish look
Full Story0
HOUZZ TOURSMy Houzz: High End Meets Budget Friendly in Toronto
Splurging selectively and saving elsewhere, a Canadian family gets a posh-looking home that matches their vision
Full Story
ECLECTIC HOMESHouzz Tour: High-Low Mix in a Colorful Victorian
An unloved house is transformed into a cheerful, versatile home with a blend of design classics, budget pieces and treasured finds
Full StoryMore Discussions

greenhouser2
jrslick (North Central Kansas, Zone 5B)Original Author
Related Professionals
Peabody Landscape Contractors · Waterbury Landscape Contractors · Westwood Landscape Contractors · Camp Verde Landscape Contractors · Duarte Landscape Contractors · Kahului Landscape Contractors · New Berlin Landscape Contractors · Oakland Landscape Contractors · Paso Robles Landscape Contractors · St. Louis Landscape Contractors · Tamarac Landscape Contractors · West Covina Landscape Contractors · Raytown Landscape Contractors · Suisun City Landscape Contractors · Syosset Solar Energy Systemsdbrya1
mudhouse_gw
jrslick (North Central Kansas, Zone 5B)Original Author
hanselmanfarms