


New 10 x 12 HFGH
jba3fan
16 years ago
Sort by:Oldest
Comments (25)
Related Stories
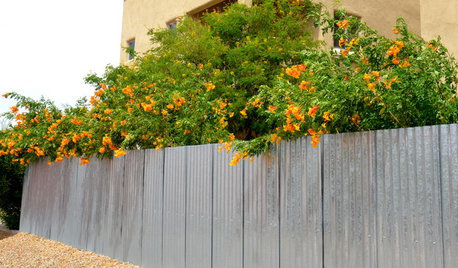
FLOWERS AND PLANTSTecoma x ‘Orange Jubilee’ Enlivens Southern Gardens
Masses of orange trumpet-shaped flowers decorate this tall shrub, attracting hummingbirds from near and far
Full Story
REMODELING GUIDESTop 10 Tips for Choosing Shower Tile
Slip resistance, curves and even the mineral content of your water all affect which tile is best for your shower
Full Story
REMODELING GUIDES10 Tile Patterns to Showcase Your Floor
There's more to a tile floor than the tile itself; how you lay out your tile can change the look and feel of the room
Full Story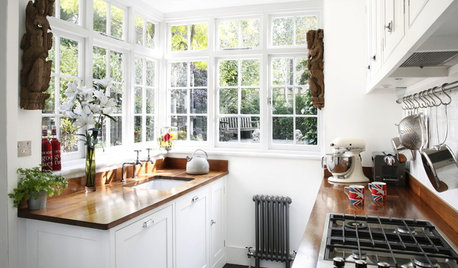
SMALL KITCHENS10 Things You Didn't Think Would Fit in a Small Kitchen
Don't assume you have to do without those windows, that island, a home office space, your prized collections or an eat-in nook
Full Story
KITCHEN DESIGN10 Big Space-Saving Ideas for Small Kitchens
Feeling burned over a small cooking space? These features and strategies can help prevent kitchen meltdowns
Full Story
OUTBUILDINGS10 Cool Ideas for Backyard Retreats and Playhouses
Get away from it all without packing a bag, by setting up an outbuilding tailored to your imagination
Full Story
HOME GYMS10 Elements of an Inspiring Home Gym
Give yourself an incentive to exercise regularly by creating a workout zone that will get you moving at home
Full Story
SMALL SPACES10 Tiny Kitchens Whose Usefulness You Won't Believe
Ingenious solutions from simple tricks to high design make this roundup of small kitchens an inspiring sight to see
Full Story
RUGS10 Tips for Getting a Dining Room Rug Just Right
Is the rug you’re considering the right size, shape and weave for your dining room? Here’s what to keep in mind
Full Story
DECORATING GUIDESHere's How to Steer Clear of 10 Top Design Don'ts
Get interiors that look professionally styled even if you're taking the DIY route, by avoiding these common mistakes
Full Story

mudhouse_gw
amigatec
Related Professionals
Maple Valley Landscape Architects & Landscape Designers · Salem Landscape Architects & Landscape Designers · Hartford Landscape Contractors · Mooresville Landscape Contractors · Peabody Landscape Contractors · Braintree Landscape Contractors · Centereach Landscape Contractors · Doctor Phillips Landscape Contractors · Los Banos Landscape Contractors · Melrose Landscape Contractors · San Bruno Landscape Contractors · Shirley Landscape Contractors · Spring Landscape Contractors · Uxbridge Landscape Contractors · Elmwood Park Solar Energy Systemsjba3fanOriginal Author
mudhouse_gw
gardenerwantabe
amigatec
mudhouse_gw
amigatec
jba3fanOriginal Author
amigatec
mudhouse_gw
jba3fanOriginal Author
texazgal
mudhouse_gw
pcan-z9
mudhouse_gw
oakhill (zone 9A, Calif.)
jba3fanOriginal Author
oakhill (zone 9A, Calif.)
jba3fanOriginal Author
oakhill (zone 9A, Calif.)
jba3fanOriginal Author
stressbaby
oakhill (zone 9A, Calif.)
jbest123