


25 HP Briggs won't rev up to top rpm.
cedarghost
12 years ago
Related Stories

GREEN BUILDINGLet’s Clear Up Some Confusion About Solar Panels
Different panel types do different things. If you want solar energy for your home, get the basics here first
Full Story
KITCHEN DESIGNKitchen Confidential: Amp Up Your Storage With Pullouts
See 12 types of cabinet pullouts that make your cooking and cleaning items easier to find and use
Full Story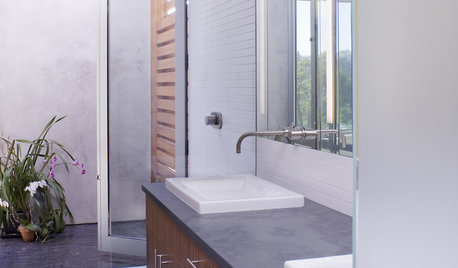
BATHROOM DESIGN10 Amenities to Make Your Bathroom Extraordinary
Go beyond the basics for a luxury bathroom experience, with extra-special options starting at only $25
Full Story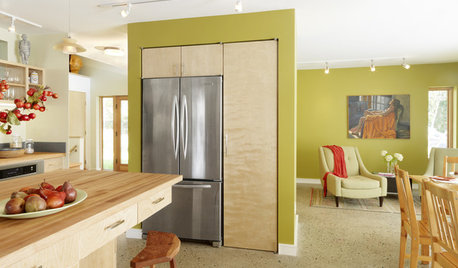
REMODELING GUIDESGet the Look of a Built-in Fridge for Less
So you want a flush refrigerator but aren’t flush with funds. We’ve got just the workaround for you
Full Story
KITCHEN CABINETS9 Ways to Save Money on Kitchen Cabinets
Hold on to more dough without sacrificing style with these cost-saving tips
Full Story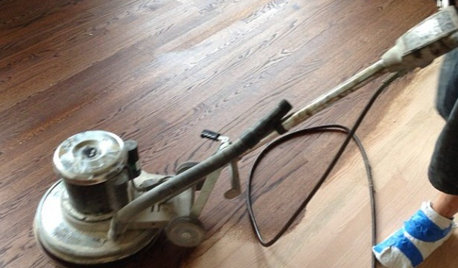
GREAT HOME PROJECTSWhat to Know Before Refinishing Your Floors
Learn costs and other important details about renewing a hardwood floor — and the one mistake you should avoid
Full Story
INSIDE HOUZZUsing Houzz: Create a Home To-Do List
See how to use an ideabook to keep track of your home projects this year
Full Story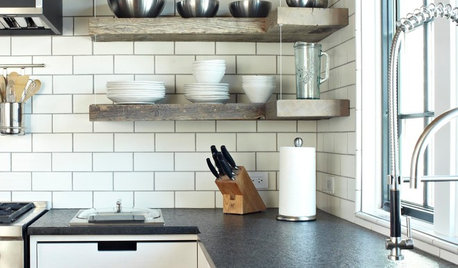
KITCHEN DESIGNKitchen Confidential: 13 Ideas for Creative Corners
Discover clever ways to make the most of kitchen corners to get extra storage and additional seating
Full Story
KITCHEN DESIGN7 Steps to Pantry Perfection
Learn from one homeowner’s plan to reorganize her pantry for real life
Full Story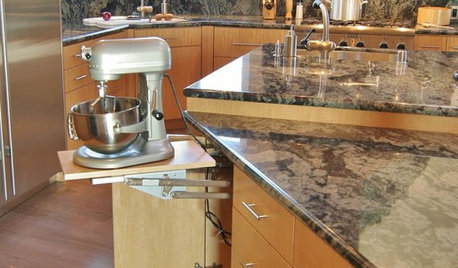
KITCHEN DESIGNKitchen Design: Baking Stations Make Cooking More Fun
Get inspired to cook (and simplify holiday prep) with a dedicated space for baking
Full Story
cedarghostOriginal Author
cedarghostOriginal Author
Related Professionals
Citrus Heights Landscape Architects & Landscape Designers · Arlington Landscape Contractors · Brownsville Landscape Contractors · Darien Landscape Contractors · Deer Park Landscape Contractors · Englewood Landscape Contractors · Hendersonville Landscape Contractors · Melrose Park Landscape Contractors · Mission Landscape Contractors · San Rafael Landscape Contractors · Waipahu Landscape Contractors · West Allis Landscape Contractors · West Orange Landscape Contractors · Brookfield Window Contractors · Morro Bay Window Contractorsmownie
cedarghostOriginal Author
mownie
cedarghostOriginal Author
mownie
cedarghostOriginal Author
briggsgalaxieman
cedarghostOriginal Author
briggsgalaxieman
cedarghostOriginal Author
cedarghostOriginal Author
mownie
baymee
cedarghostOriginal Author
cedarghostOriginal Author
rcmoser
cedarghostOriginal Author
baymee
cedarghostOriginal Author
cedarghostOriginal Author
cedarghostOriginal Author
baymee
cedarghostOriginal Author
mownie
baymee
cedarghostOriginal Author
mownie
cedarghostOriginal Author
cedarghostOriginal Author
mownie
cedarghostOriginal Author
cedarghostOriginal Author
cedarghostOriginal Author
mownie
cedarghostOriginal Author
mownie
cedarghostOriginal Author
cedarghostOriginal Author
mownie
briggsgalaxieman
mownie
briggsgalaxieman
cedarghostOriginal Author
briggsgalaxieman
cedarghostOriginal Author
cedarghostOriginal Author
baymee
cedarghostOriginal Author