


Hypertufa Arches like the Medieval Cloisters
desperationfalls
17 years ago
Sort by:Oldest
Comments (28)
Related Stories
MY HOUZZMy Houzz: Contemporary Belgian Style Transforms a Dutch Country Cottage
Travel mementos and art fill this couple’s comfortable weekend countryside retreat in the Netherlands
Full Story
TRAVEL BY DESIGNHouzz Travel Guide: New York City for Design Lovers
Where to stay, shop, eat and explore in the Big Apple, from a design-minded architect who lives there
Full Story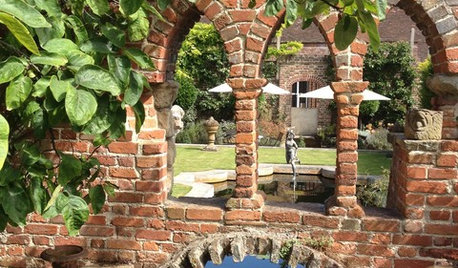
LANDSCAPE DESIGNExplore a Magical Restored English Garden
History comes alive in the gardens of a Rochester townhouse, filled with sculptural yew, a topiary parterre and an archway-draped pond
Full StorySponsored
Running_Dog
desperationfallsOriginal Author
Related Professionals
South Elgin Landscape Architects & Landscape Designers · Roxbury Crossing Landscape Architects & Landscape Designers · Arlington Landscape Contractors · Salem Landscape Contractors · Bristol Landscape Contractors · Cicero Landscape Contractors · Davis Landscape Contractors · Hilo Landscape Contractors · Lancaster Landscape Contractors · Metairie Landscape Contractors · Thonotosassa Landscape Contractors · Palos Hills Landscape Contractors · Four Corners Landscape Contractors · Camp Springs Landscape Contractors · Ferguson Landscape ContractorsDebZone8
tango88
lazydaisy
tango88
Running_Dog
rockhewer
tango88
lazydaisy
desperationfallsOriginal Author
lazydaisy
desperationfallsOriginal Author
ltd123
tango88
desperationfallsOriginal Author
nmgirl
tufftufa
DebZone8
desperationfallsOriginal Author
rustinj
tufftufa
Dena6355
nmgirl
desperationfallsOriginal Author
Dena6355
nathanhurst
nathanhurst